TPU and nylon guide: flexible and engineering-grade filament without guesswork
By Let’s 3D Studio · 20 min read
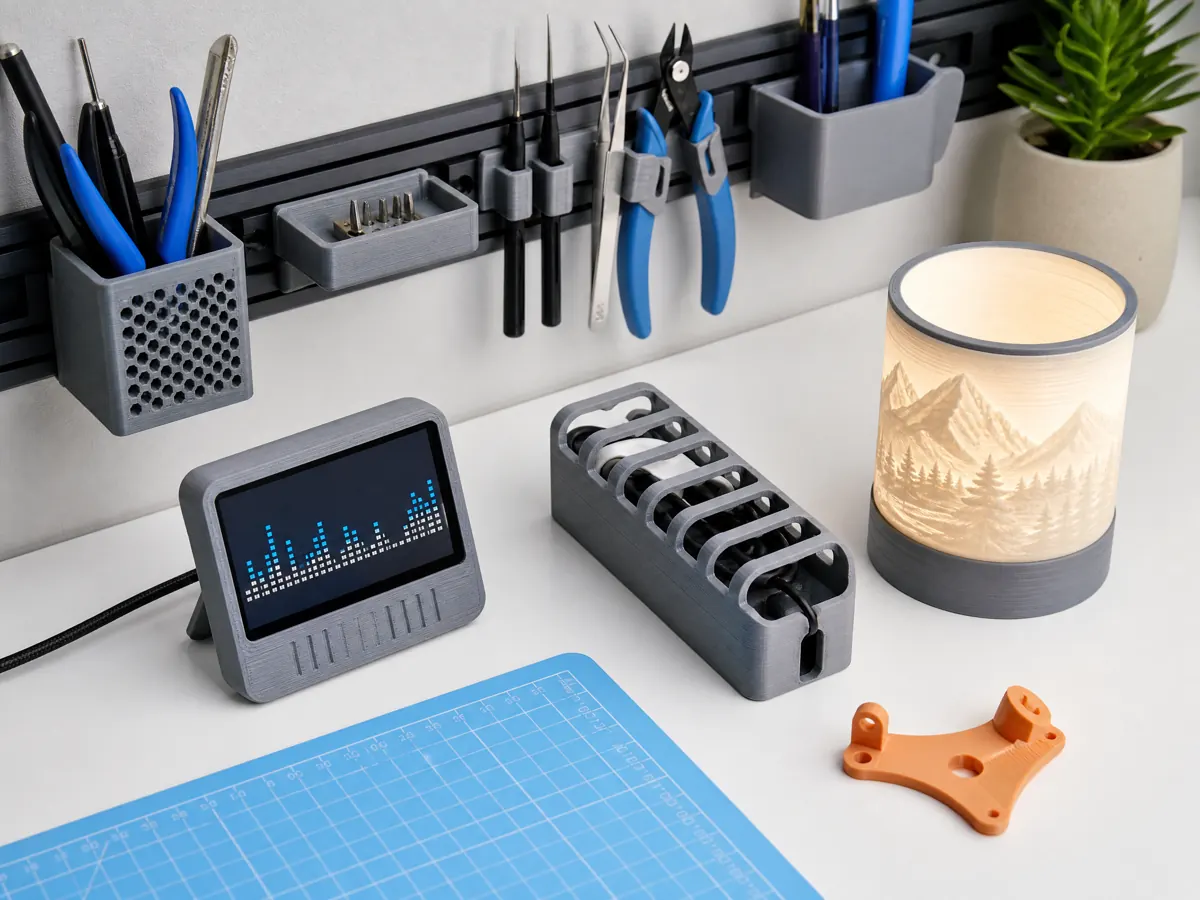
TPU and nylon sit at opposite ends of the user experience spectrum while both serving real-world parts: TPU is the go-to for flexible, grippy, impact-tolerant components, and nylon is a tough, fatigue-resistant base for engineering fixtures, gears, and living hinges. They also punish guesswork. TPU can jam or string if the path isn’t perfectly controlled. Nylon absorbs moisture quickly and warps if thermals are not tamed. This guide provides practical starting ranges that get you printing sooner, then shows how to diagnose and iterate without burning days on trial and error.
What you’ll get:
- Clear decision criteria to choose TPU vs. nylon
- Practical starting points for printers, slicers, and handling
- Practical design moves for durable, accurate parts
- Troubleshooting built on the telltale symptoms each filament leaves behind
No single setting fits every printer or brand. Treat the ranges here as a dependable first lap, then fine-tune using the diagnostic steps.
When to choose TPU vs. nylon
Think in terms of the part’s job and environment.
- Choose TPU if the part must flex repeatedly, absorb shocks, grip surfaces, dampen vibration, or conform to irregular shapes. Examples: phone cases, vibration isolators, seals, belts, flexible hinges, tire treads, cable strain reliefs, overmolds, compliant grippers.
- Choose nylon if the part must resist wear, survive under repeating loads, thread or tap reliably, and tolerate moderate heat, sunlight, and chemicals better than basic PLA or PETG. Examples: jigs and fixtures, gears, living hinges, snap-fits, threaded housings, drone parts, RC components.
Short comparison table:
| Aspect | TPU (e.g., Shore 85A–98A) | Nylon (e.g., PA6/PA12, CF-PA) |
|---|---|---|
| Flexibility | High; elastomeric | Low–moderate; tough and slightly ductile |
| Impact/vibration | Excellent damping | Good impact strength, less damping |
| Abrasion | Good | Very good; CF-PA is excellent |
| Heat tolerance | Moderate (often ~60–90°C softening) | Moderate–higher (varies by grade; many usable near 80–120°C) |
| Moisture sensitivity | Moderate | High; print and store dry |
| Warping tendency | Low | Medium–high; enclosure helps |
| Print speed | Slow–moderate | Moderate |
| Extruder preference | Direct drive preferred | Either; enclosure often needed |
| Nozzle wear | Normal | CF-PA is abrasive (use hardened nozzle) |
Caveats:
- Grades vary widely by brand. It’s common for nylon formulations to print anywhere from 235–290°C and to shrink differently; TPU hardness and melt-flow vary. Start with the label’s range, then use the tuning steps below.
- CF stands for chopped carbon fiber. It stiffens nylon, reduces shrinkage, and improves dimensional stability at the cost of increased nozzle wear and slightly lower interlayer toughness.
Printer readiness checklist
Before touching slicer settings, stabilize the machine. Most TPU or nylon issues are mechanical or environmental rather than slicer errors.
For TPU
- Extruder: Direct drive or a short, well-constrained Bowden path. Dual-drive gears (e.g., two hobbed surfaces) improve grip on soft filaments.
- Filament path: Ensure no gaps between drive gear, guide, and heatbreak entry. TPU will “accordion” into any void.
- Nozzle: 0.4–0.6 mm reduces back-pressure. Fresh, unworn brass is fine.
- Hotend: An all-metal heatbreak avoids heat creep across longer prints. Ensure the heatbreak is well cooled.
- Spool path: Low-friction holder with clean bearings. TPU amplifies any drag.
- Z offset and bed: First layer should be slightly squished but not pinched. Over-compression worsens elephant’s foot and stringing.
For nylon
- Enclosure: Strongly recommended to stabilize ambient around 35–45°C for unfilled PA; 40–60°C for many CF nylons. A heated chamber is helpful but not mandatory if an enclosure is present.
- Build plate: Smooth PEI, garolite, or glass with a thin PVA glue film are common paths. Dedicated nylon adhesives exist; use per instructions.
- Nozzle: Brass is fine for unfilled PA. Use hardened steel or ruby for CF-PA. Consider 0.5–0.6 mm for CF to reduce clog risk.
- Moisture control: Dry spool before printing and keep it dry during the print using a drybox or sealed container with desiccant and a filament feed-through.
- Bed heat capacity: Ensure bed reaches and maintains 70–90°C without large swings.
Handling and drying: control moisture first
Nylon, and to a lesser extent TPU, will pull water from the air; this changes melt behavior and ruins surface finish.
Signs of wet filament:
- Audible popping or hissing from the nozzle
- Steam wisps, bubbly or foamy extrusion, matte/rough surfaces
- Excess stringing and poor interlayer adhesion at normal temperatures
- For nylon: dramatic loss of layer bonding even as temperatures increase
Practical drying ranges:
- TPU: 45–55°C for 4–6 hours, then store dry. Some harder TPUs tolerate near 60°C; start low.
- Nylon (unfilled): 70–80°C for 6–12 hours, then store dry. Many PA12s prefer the lower end; PA6 often needs the upper end.
- CF-nylon: Follow the base nylon recommendations. The fiber doesn’t absorb water, but the matrix does.
Dry in a purpose-built filament dryer, or only use an oven if its temperature has been independently verified and the filament manufacturer permits that method. Avoid setting close to the filament’s glass transition or softening point; spools can deform. After drying, keep filament in a sealed container with desiccant or print straight from a drybox.
Baseline slicer starting points
These ranges are safe first laps for many printers and mainstream brands. Use them to get an acceptable print, then refine.
TPU starting points
- Nozzle temperature: 215–240°C
- Bed temperature: 30–60°C
- Chamber: Not required; ambient ~20–30°C is fine
- Layer height: 0.2–0.28 mm (coarser layers increase flow stability)
- Nozzle diameter: 0.4–0.6 mm
- Perimeters: 3–4 for functional parts; increase wall thickness before infill
- Top/bottom thickness: 0.8–1.2 mm each
- Infill: 15–35% for flexible behavior; gyroid and grid distribute strain well
- Print speed: 15–35 mm/s perimeters; 20–40 mm/s infill
- Retraction:
- Direct drive: 0.5–1.2 mm, 15–25 mm/s
- Bowden: 2–4 mm, 20–35 mm/s (use the low end first)
- Cooling fan: 20–60%; just enough to preserve detail without embrittling layers
- Flow: 100–105% (TPU compresses under drive; a small bump can help)
- Combing/coasting: Often disable coasting and reduce combing to within infill to minimize stringing without starving perimeters
- Travel moves: 120–160 mm/s helps reduce oozing time
- Z hop: Off unless you see scars; TPU can wobble on hops
Why these settings: Soft filaments prefer slow, steady flow with limited retraction. Higher fan keeps bridges tidy, but too much creates weak bonding. Minimizing back-pressure (larger nozzle, thicker layers, fewer retractions) lowers the risk of buckling.
Nylon starting points (unfilled)
- Nozzle temperature: 245–270°C
- Bed temperature: 70–90°C
- Chamber/enclosure: Enclosed build volume; aim for still air around 35–45°C
- Layer height: 0.16–0.24 mm for finer surfaces; 0.2–0.28 mm for structural parts
- Nozzle diameter: 0.4–0.6 mm
- Perimeters: 3–5 depending on load; nylon’s toughness benefits from solid walls
- Top/bottom thickness: 1.0–1.6 mm each
- Infill: 20–50% for general parts; 60–100% for fixtures and threads
- Print speed: 35–60 mm/s perimeters; 40–70 mm/s infill
- Retraction:
- Direct drive: 0.8–1.6 mm, 25–35 mm/s
- Bowden: 3–6 mm, 30–45 mm/s
- Cooling fan: 0–20%; minimal cooling to avoid layer shrinkage
- Adhesion: 5–10 mm brim or a thin glue film on smooth bed surfaces
CF-nylon adjustments
- Nozzle temperature: Typically +5–10°C vs. base PA
- Speed: 30–50 mm/s to maintain consistent flow
- Nozzle: Hardened 0.5–0.6 mm strongly recommended
- Fan: 0–10%; let the part cool slowly to limit internal stress
- Notes: CF reduces shrinkage and improves dimensional stability; it can improve overhangs and surface flatness but slightly lowers layer-to-layer toughness compared to unfilled PA.
Bed surfaces and adhesion strategy
- TPU:
- PEI textured sheets often grip TPU extremely well. Apply a light glue stick as a release agent to avoid fusing the part to the sheet.
- Glass or smooth PEI with a thin PVA glue film works consistently. Moderate bed temperatures (40–50°C) provide just enough tack.
- Use a moderate first-layer squish; over-compressing increases elephant’s foot and makes parts hard to remove.
- Nylon:
- PVA glue film on glass or smooth PEI is a reliable baseline. Apply a thin, even layer; reapply each long print.
- Garolite plates provide strong mechanical adhesion. Still use a minimal glue film to control stick and protect the surface.
- If corners lift, increase brim width, slightly raise bed temperature within the safe range, and enclose the build space.
- For tall or thin parts, consider a draft shield or sacrificial skirt wall 3–5 lines thick to reduce edge cooling.
Tuning by symptoms: what the print is telling you
Work from the evidence left by your part. Make one change at a time and reprint the shortest test that can isolate the issue.
TPU diagnostics
- Symptom: Under-extrusion on infill, but perimeters look okay
- Likely cause: Back-pressure from small nozzle, fast speed, or thick infill lines pushing filament to buckle upstream.
- Fix: Increase nozzle size to 0.6 mm, reduce speed 20–30%, increase temperature 5–10°C, and reduce infill line width to 100% of nozzle size.
- Symptom: Stringing and hair on travel moves
- Likely cause: Highly elastic melt pool, low viscosity, or moisture.
- Fix: Verify dryness first. Increase travel speed; decrease retraction distance; enable wipe; restrict combing to infill; raise fan slightly; increase temperature only if layer bonding is weak.
- Symptom: Jams after long retracts
- Likely cause: TPU ballooning into gaps or heat creep.
- Fix: Reduce retraction distance and frequency; add a 1–2 mm retraction minimum travel threshold; ensure hotend cooling is adequate; lower nozzle temperature if printing slowly.
- Symptom: Soft, mushy first layers with elephant’s foot
- Likely cause: Bed temperature too high or Z offset too low.
- Fix: Reduce bed by 5–10°C; raise Z offset by 0.02–0.05 mm; add a 0.2 mm chamfer in CAD to mask compression.
Nylon diagnostics
- Symptom: Corner lifting and edge warping
- Likely cause: Steep thermal gradient; insufficient adhesion; drafts.
- Fix: Enclose the printer; add 8–12 mm brim; raise bed temperature 5°C; reduce fan; slow first-layer speed; use a draft shield.
- Symptom: Brittle layers, part snaps along Z
- Likely cause: Moisture, too much fan, or too low nozzle temperature.
- Fix: Dry the filament; reduce fan to near 0%; increase nozzle temperature 5–10°C; consider thicker layers and slower print speed to enhance melt fusion.
- Symptom: Bubbles, foamy surface, and noisy extrusion
- Likely cause: Wet filament.
- Fix: Dry longer; print from a drybox; reduce time outside sealed storage.
- Symptom: Excess oozing on idle nozzle during dual-extrusion
- Likely cause: High viscosity shift and long dwell at temperature.
- Fix: Use standby temperature reduction; add prime tower; minimize soak time; consider same-material supports if soluble options don’t cooperate.
Retraction and pressure control
- TPU: Use the shortest, slowest retraction that still removes surface zits. Emphasize travel optimization over retraction. If your slicer supports pressure advance or linear advance, apply conservative values; too aggressive pressure modulation can cause pulsing in soft filaments.
- Nylon: Nylon benefits from moderate retraction and clean travel paths. Coasting and wipe can help on perimeters but can starve sharp corners; test on a corner cube or simple bracket.
Geometry, infill, and wall strategy
- TPU:
- Think in terms of spring mechanics. Wall thickness is your primary stiffness dial. Two to three perimeters with 0–20% infill yields flexible hinges; four to six perimeters with minimal infill creates semi-rigid shells.
- Infill pattern: Gyroid and grid spread loads smoothly; avoid line infill for parts that must flex in all directions.
- Bridges and overhangs: TPU sags more. Support shallow overhangs (>45°). Slightly more fan and lower speeds help.
- Hole sizing: TPU recovers elastically; print holes 0.1–0.3 mm undersized per 10 mm diameter as a starting point if you expect a press fit. Iterate with your brand.
- Nylon:
- Prioritize perimeters for structural parts. Wall count and thickness dominate strength because nylon’s interlayer adhesion, when dry and hot enough, is strong.
- Infill: For fixtures, 40–60% grid or cubic plus 4–5 perimeters gives rigidity without a fully solid core. For gears or threads, solid infill around the features with modifiers is helpful.
- Overhangs: Nylon can slump if fan is too low; add minimal fan on overhangs only or slow down. CF-PA handles overhangs better thanks to fiber reinforcement.
- Hole sizing: Nylon shrinks during cooling. Start with 0.1–0.3 mm oversize per 10 mm diameter and tune with a test coupon.
Dimensional accuracy and shrinkage planning
- TPU: Expect slight springback during cutting and measurement. For press fits, undersize male features or oversize female features by 0.1–0.2 mm, then dial in with a three-step test. Long, thin TPU parts elongate during removal; measure after the part has rested flat for several minutes.
- Nylon: Shrinkage depends on chemistry and part geometry. Unfilled PA6 tends to shrink more than PA12 or CF blends. Start by:
- Printing a 40–60 mm calibration cube and a ring with inner/outer diameters
- Measuring in XY and Z, then applying a uniform XY compensation of 0.2–0.6% if needed
- Considering part orientation: Align the longest dimension along the Y axis if your printer’s Y is stiffer or if your enclosure airflow is steadier along that axis
Bed adhesion and first layer, step-by-step
- Clean surface with isopropyl alcohol; avoid touching the center area.
- Apply a thin, even PVA glue film for nylon or as a release film for TPU that grips too strongly.
- Level the bed and set Z offset to produce a consistent 50–70% track overlap, not a smear.
- First layer speed: 15–20 mm/s for TPU; 20–30 mm/s for nylon.
- Watch for:
- Glossy, over-squished lines (too low) vs. rounded beads with gaps (too high).
- TPU that peels up with the nozzle indicates too little bed heat or too much fan on layer one.
- Nylon corners curling in the first 10 layers means you need a brim or higher enclosure temperature.
Cooling strategy
- TPU: Use moderate fan to lock geometry while preserving interlayer bonding. For small details, increase fan temporarily or use slower speeds to prevent heat build-up.
- Nylon: Minimal fan. If purely mechanical strength trumps cosmetics, leave fan off entirely. For bridging, allow 10–20% fan only during bridges, then return to 0–10%.
Support materials and strategies
- TPU: Same-material supports are messy to remove. Use denser interfaces with small air gaps and limit supports to what’s mechanically necessary. Consider changing part orientation to avoid supports. If you have soluble elastomeric supports compatible with your TPU grade, follow vendor guidance; compatibility is not universal.
- Nylon: Same-material or dedicated breakaway supports are often the most reliable. Water-soluble PVA-type supports can absorb moisture and degrade during nylon prints; results vary. If using soluble supports, keep both filaments extremely dry and consider a higher interface spacing to reduce bonding.
Hardware upgrades that move the needle
- For TPU:
- Direct drive extruder with constrained filament path
- Dual-drive gears and a short, polished guide path
- Larger nozzle (0.5–0.6 mm) to tame back-pressure
- Low-friction spool holder and filament guide
- For nylon:
- Enclosure or passive chamber
- Hardened nozzle for CF composites
- Build plate options: garolite or high-temperature PEI sheet
- Drybox with sealed feed-through
Post-processing
- TPU:
- Trimming: Use sharp flush cutters or a razor; TPU stretches, so support the cut area to avoid tears.
- Heat forming: Gentle heat (heat gun at a safe distance) can relax curls; move continuously to avoid gloss patches.
- Bonding: Some cyanoacrylate gels can work, but bond strength varies. Mechanical fasteners or dovetail joints are more reliable.
- Painting: Flexible coatings formulated for plastics adhere better; test on a scrap.
- Nylon:
- Machining: Drilling and tapping work well; use sharp tools and moderate speeds. Nylon is slippery; clamp securely.
- Threading strategy: Heat-set brass inserts provide durable threads. Preheat the insert tool and sink slowly to avoid melting cavities.
- Annealing: For stress relief and dimensional stability, a low-temperature anneal near 70–90°C can help. Support the part to avoid sag and monitor carefully. Expect slight dimensional change; anneal test coupons before committing critical parts.
- Surface finishing: Light sanding works; nylon tends to fuzz. Flame polishing is risky and not recommended.
Safety and environmental notes
- Ventilation: Nylon can emit noticeable odors and ultrafine particles during printing. Operate in a well-ventilated area or use an enclosure with appropriate filtration. Keep bystanders, especially children, out of the immediate print zone.
- Hot surfaces: Beds near 90°C and hotends near 270°C pose burn hazards. Allow cooling time before handling.
- Dust and fibers: CF-nylon generates abrasive dust when sanding or machining. Wear eye protection and use suitable particulate respiratory protection when creating dust, following the material safety data sheet and local guidance. Clean machinery afterward.
- Food contact: Unless your complete toolchain and filament are specifically documented for such use, assume parts are not food safe.
- Electrical or load-bearing uses: Printed parts are anisotropic and sensitive to temperature and moisture. Validate in your own application with safety factors.
Design patterns that help parts survive
- TPU hinge or living joint:
- 0.8–1.6 mm web thickness with a long radius transition prevents stress risers.
- Use 2–4 perimeters and low infill under the hinge region.
- Orient layers along the hinge line to distribute strain.
- TPU grips and pads:
- Model internal ribs or air channels under the surface to tune squish.
- Add small draft angles (1–2°) for easy removal from flat beds.
- Nylon brackets and fixtures:
- Fillet internal corners generously (1–3 mm) to reduce crack initiation.
- Use load-aligned perimeters: print such that filament strands run parallel to the main tensile direction when possible.
- For bolt holes, model 0.2–0.4 mm oversize, then insert heat-set inserts rather than tapping printed plastic.
- Nylon gears:
- Prefer CF-PA for stiffness and accuracy; unfilled PA for quieter operation.
- Print with 100% infill in the gear body and 4–6 perimeters; slow perimeters for clean tooth flanks.
Common failure patterns and quick fixes
| Symptom | Material | Likely causes | First fixes |
|---|---|---|---|
| Corners lifting | Nylon | Cool drafts, low bed temp, no brim | Enclose, +5°C bed, add 10 mm brim |
| Bubbly surface | Nylon/TPU | Moisture | Dry longer, print from drybox |
| Stringing curtains | TPU | Moisture, long retractions, slow travel | Dry, cut retraction, faster travel, limit combing |
| Layer splits (Z cracks) | Nylon | Too cool, too much fan, moisture | +10°C nozzle, 0–10% fan, dry |
| Jams after pauses | TPU | Heat creep, softening in heatbreak | Improve hotend cooling, lower temp, resume with purge |
| Brittle snap-fits | Nylon | Over-cooling, thin walls, poor bonding | Reduce fan, add perimeters, slower print |
Advanced dialing-in sequence
If you want a structured path to dial TPU or nylon in one afternoon:
- Step 1: Dry the filament and set up environmental controls (enclosure for nylon; constrained path for TPU).
- Step 2: Print a temperature tower within the recommended range. Look for layer adhesion, overhang quality, and surface sheen.
- Step 3: Print a stringing test with three retraction distances and speeds. Choose the least stringy that maintains consistent extrusion.
- Step 4: Print a 40 mm cube and a thin wall test for flow calibration. Adjust flow by ±2–5% to hit nominal thickness and mass.
- Step 5: Print a bridging test. For TPU, increase fan slightly and slow down; for nylon, reduce fan and slow, or use minimal fan only during bridges.
- Step 6: Validate with a small functional part oriented like your final design.
Realistic print speeds and throughput
- TPU: Expect 15–30 mm/s perimeters on most consumer printers without specialized extruders. You can push faster with stiffer TPUs and larger nozzles, but watch for under-extrusion and buckling.
- Nylon: 40–60 mm/s is practical for accurate parts. CF-PA can run similar speeds but benefits from slightly slower perimeters to maintain crisp edges.
If you must print fast:
- Increase nozzle diameter to 0.6–0.8 mm and layer height to 0.28–0.36 mm while accepting rougher surfaces.
- For TPU, keep retractions to a minimum and favor combing inside infill.
- For nylon, enforce an enclosure and slightly higher temperatures to preserve bonding at speed.
Material-specific quirks worth remembering
- TPU shore hardness matters:
- 85A–90A: Very soft, shoe-sole feel, highest stringing tendency, lowest print speed.
- 95A–98A: Balanced; good for most flexible functional parts.
- 60D and up: Approaches semi-rigid; prints more like PETG with extra elasticity.
- Nylon family differences:
- PA6: Tough and strong, higher shrink, prints hotter, more warp-prone.
- PA12: More dimensionally stable, prints slightly cooler, better for large parts.
- Blends: Many include modifiers for warping and moisture. Use the vendor’s temp window, then apply the diagnostics here.
- CF-nylon nozzle wear:
- Abrasive fibers will quickly erode brass or soft hardened nozzles. Use high-quality hardened steel or a gemstone nozzle and check extrusion width calibration periodically.
Maintenance and longevity
- For TPU:
- Keep the filament path clean. Debris increases drag. Lightly polish printed PTFE guides if the filament rubs.
- Inspect extruder gears for TPU residue; clean gently to maintain grip.
- Store reels with desiccant; TPU can relax on the spool in warm rooms—avoid direct sun or hot enclosures for storage.
- For nylon:
- Purge with a less hygroscopic material after printing if your hotend will sit idle; this can reduce corrosion or residue. A short length of PETG works as a purge in many setups.
- Re-dry spools before every large project, even if they’ve been sealed; repeated opening introduces moisture.
Making the first print succeed: two recipes
Use these short recipes as conservative first trials, then adjust from the evidence your machine and material produce.
- TPU phone case or bumper:
- 0.4–0.6 mm nozzle, 0.24 mm layers
- 4 perimeters, 0–10% gyroid infill
- 225°C nozzle, 45°C bed, 30% fan
- Speed 25 mm/s perimeters, 30 mm/s infill
- Retraction 0.8 mm at 20 mm/s (direct) or 2.5 mm at 25 mm/s (Bowden)
- Brim off; Z offset slightly higher to avoid excessive squish
- Nylon clamp or small bracket:
- 0.4–0.6 mm nozzle, 0.2–0.24 mm layers
- 4 perimeters, 50% grid infill
- 255°C nozzle, 80°C bed, fan 0–10%
- Enclose the build volume; add 8 mm brim
- Speed 45 mm/s perimeters, 55 mm/s infill
- Retraction 1.2 mm at 30 mm/s (direct) or 4.0 mm at 35 mm/s (Bowden)
- Apply thin PVA glue on the bed
Troubleshooting deep dive: reasoning from evidence
- If nylon corners lift despite an enclosure and brim, check thermal uniformity. The part surface that faces the enclosure’s door often cools faster. Rotate the part 90 degrees and reprint a 5–10 mm tall section. If lifting changes sides, add a draft shield or raise ambient slightly.
- If TPU shows periodic under-extrusion bands, inspect filament path for intermittent friction: bent spool hub, tight filament guide, or filament rubbing the spool flange as the roll empties. Print a single-wall tube at constant speed and watch the extruder motor for rhythmic skipping.
- If CF-nylon overhangs look furry while perimeters are crisp, your nozzle may be too cool for the sparse lines. Increase nozzle temperature by 5–10°C and reduce per-layer time by increasing minimum layer time threshold or printing multiple parts to keep the hotend in steady state.
- If nylon layers fuse well but holes measure undersized in XY, you may have both shrinkage and slight over-extrusion. First, calibrate flow using a thin-wall cube to ensure line width is accurate; then apply 0.2–0.6% XY compensation. Use a stepped test plate with many hole sizes to hone in on your best offset.
Practical ranges to keep in your pocket
- TPU:
- 215–240°C nozzle, 30–60°C bed, 15–35 mm/s
- Retraction 0.5–1.2 mm (direct) or 2–4 mm (Bowden)
- Fan 20–60%, dry at ~50°C for 4–6 h
- Nylon:
- 245–270°C nozzle, 70–90°C bed, 35–60 mm/s
- Retraction 0.8–1.6 mm (direct) or 3–6 mm (Bowden)
- Fan 0–20%, dry at ~70–80°C for 6–12 h
- Enclosure targeting still air near 35–45°C
- CF-nylon:
- +5–10°C vs. base PA, 0–10% fan, 0.5–0.6 mm hardened nozzle
Conclusion: confidence without guesswork
TPU and nylon reward careful preparation more than most filaments. Get the environment and mechanics right first: a constrained feed path and steady, low-friction motion for TPU; a dry spool, warm enclosure, and controlled first layer for nylon. Start with conservative, steady flow and let geometry and wall strategy carry the strength. Then diagnose by what the part shows you: popping means moisture, corner lift means thermal gradients, stringing means too much retraction or too little travel speed for TPU. Make one change at a time, reprint a small test, and write down what improved.
For flexible components, tune stiffness with wall thickness and select a TPU hardness that matches the job. For engineering fixtures, emphasize perimeters, controlled thermals, and post-processing that locks in dimensional stability. If you plan on CF-nylon, use a manufacturer-suitable wear-resistant nozzle and validate flow after any nozzle change.
With these ranges and reasoning patterns, you can go from the first dry spool to durable parts in a handful of prints—without superstition or endless tweaking.