PLA filament guide: settings, strengths, limits, and practical uses
By Let’s 3D Studio · 18 min read
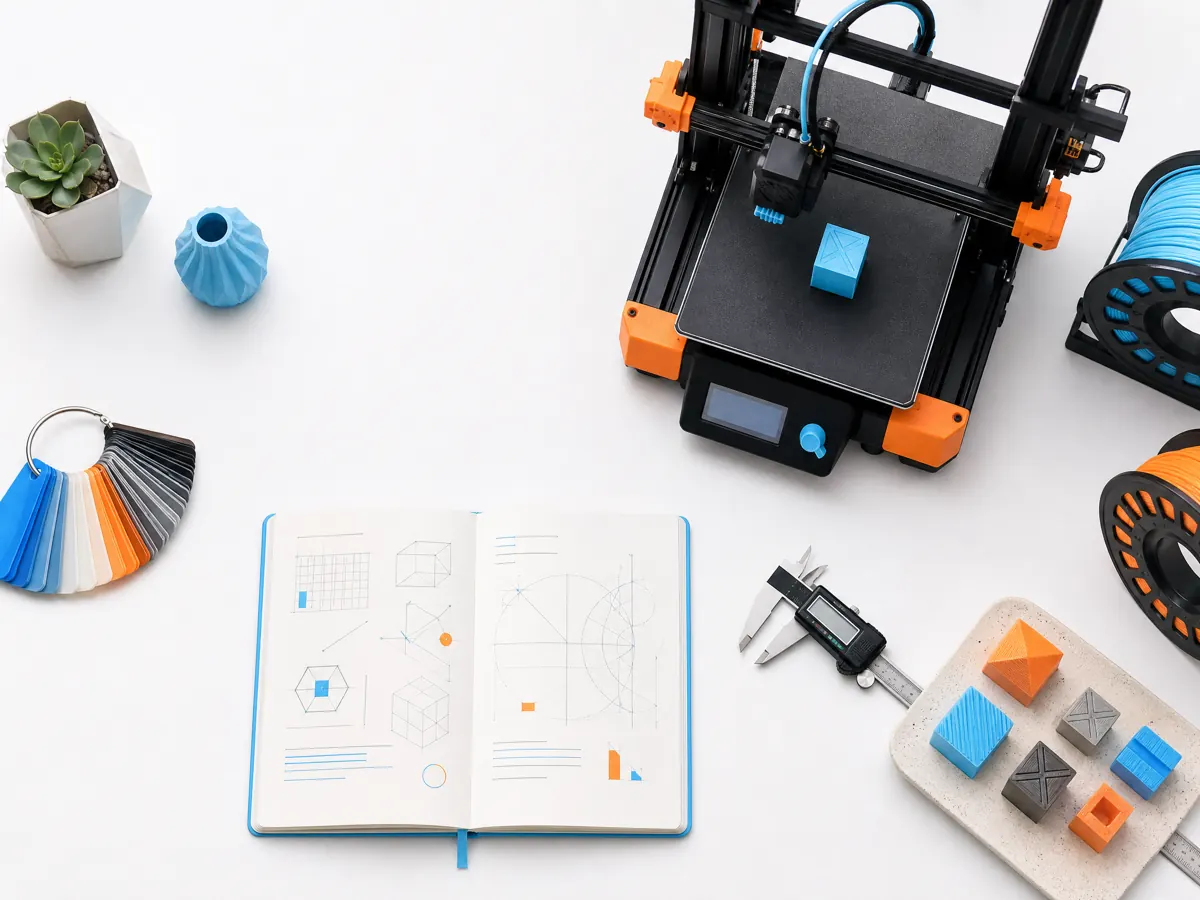
PLA is the most approachable 3D printing filament: easy to feed, forgiving of imperfect cooling, and capable of clean, bright surfaces. Yet it has sharp limits—especially heat resistance and brittleness—and the broad universe of PLA blends (toughened, silk, matte, fiber-filled) makes setup less trivial than it first appears. This guide is a practical deep dive: what PLA is, when to choose it, resilient starting settings by variant, how to diagnose issues step-by-step, and how to push surface quality or strength without unrealistic promises.
What PLA is (and is not)
PLA (polylactic acid) is a polyester derived from lactic acid, often sourced from fermented plant sugars. In filament form it prints at relatively low temperatures and has low shrinkage as it cools, which is why PLA warps less than many other thermoplastics.
Key material traits to keep in view:
- Stiffness: PLA is quite rigid and holds dimensions well.
- Brittleness: It can fracture rather than bend, especially with thin features or sharp stress risers.
- Heat softening: Glass transition is in the mid-50s to low-60s °C range; parts can deform in hot cars or sunny windows.
- Dimensional stability during printing: It shrinks very little as it cools, aiding accurate prints with minimal warping.
PLA is often described as biodegradable. In reality, it requires industrial composting conditions to break down efficiently; home composting and landfill environments do not reliably degrade it in useful timeframes. Treat it as a recyclable thermoplastic when possible and store responsibly.
When PLA is the right choice
PLA is a great default for:
- Visual prototypes, cosplay and props, models, and figurines.
- Fixtures, organizers, and jigs used at room temperature without sustained load or impact.
- Educational projects, toys without high mechanical demands, and architectural mockups.
- First prints for dialing in a new printer, thanks to easy bed adhesion and clean overhangs.
When to hesitate:
- Environments above roughly 50–55 °C (cars in summer, near heating appliances, bright sun on dark parts).
- Repeated impact, high flexing, or persistent mechanical load. Toughened PLA variants stretch this boundary but still trail PETG, Nylon, and PC blends.
- Outdoor UV exposure over long periods; PLA can embrittle. Painting or UV-stable coatings help but do not fully transform its weather resistance.
Printer readiness and hardware choices
You can print PLA with both PTFE-lined and all-metal hotends. PTFE-lined hotends are fine at PLA temperatures; just avoid extended soaks above the manufacturer’s PTFE limits. All-metal hotends offer broader temperature headroom and may reduce heat creep sensitivity with the right heat break and cooling.
Cooling is crucial with PLA:
- A strong part cooling fan and good ducting greatly improve overhangs, bridges, and crisp details.
- Make sure the heatsink fan is unobstructed; PLA is more prone to heat creep if the heat break runs hot.
Nozzle selection:
- 0.4 mm brass is a well-rounded default for standard PLA.
- 0.6 mm increases throughput and is friendly to matte and woodfill PLAs; it trades some small-detail capability.
- Hardened steel or coated nozzles are recommended for abrasive variants like fiber-filled or glow-in-the-dark PLA. Brass will wear quickly with these.
- Note that hardened nozzles may run cooler at the same temperature setting due to different thermal conductivity; adjust temperatures slightly if layer bonding weakens.
Build surfaces:
- PEI sheets (smooth or textured), well-cleaned glass, or build plates with glue-stick adhesion typically work reliably.
- For textured PEI, reduce your first-layer squish slightly; textured surfaces lock in well and can be hard to release if you over-compress.
- Clean, dry surfaces matter: PLA’s ease can mask contamination until a large flat print lifts unexpectedly.
Baseline settings that print on most machines
Treat the following as practical starting points, not guarantees. Every filament brand and printer differs slightly. Plan to make small, evidence-driven changes.
- Nozzle temperature:
- Standard PLA: 195–215 °C
- Toughened, matte, or silk PLA: 200–225 °C (some silk PLAs prefer the lower half of this range for smooth flow)
- Fiber-filled PLA: 205–230 °C (ensure nozzle suitability)
- Bed temperature: 50–65 °C for first layers; 45–60 °C thereafter. If adhesion is too strong on textured plates, step down a few degrees.
- Part cooling: 80–100% after the first 2–4 layers. For delicate overhangs and bridges, 100%.
- Speeds:
- First layer: 15–25 mm/s
- Perimeters: 35–60 mm/s
- Infill: 50–80 mm/s
- Bridges: 15–35 mm/s with high cooling
- Layer height: 0.12–0.28 mm with a 0.4 mm nozzle; 0.2–0.36 mm with a 0.6 mm nozzle.
- Retraction (starting points):
- Direct drive: 0.5–1.2 mm at 20–35 mm/s
- Bowden: 2–6 mm at 25–45 mm/s
- Flow/extrusion multiplier: 95–103%. Start near 100% and adjust based on wall-thickness verification.
- Z-hop: 0.2–0.6 mm if you see scarring on travel moves or nozzle collisions.
- Adhesion helpers: Skirt for priming; brim if corners lift on large, flat parts.
A quick comparison in context
When choosing PLA among common consumer filaments, the decision often turns on temperature and toughness.
| Property | PLA | PLA+ / Tough PLA | PETG | ABS/ASA |
|---|---|---|---|---|
| Ease of printing | Very easy | Easy | Moderate | Harder |
| Heat resistance | Low | Low–moderate | Moderate | Moderate–high |
| Impact toughness | Low | Moderate | Moderate–high | Moderate |
| Warping tendency | Low | Low | Low–moderate | Moderate–high |
| Surface detail | Crisp | Crisp | Slightly softer edges | Softer edges |
| Outdoor use | Limited | Limited | Better | ASA better than ABS |
Use this table as a directional guide only; exact behavior varies by brand and blend.
A step-by-step PLA dial-in process
Follow this order to reduce confounding effects:
- Verify mechanical extrusion first
- Ensure the extruder gear is clean and tensioned appropriately. Too tight crushes filament; too loose slips.
- Check that the filament path is smooth—spool unwinds freely without sharp angles.
- If you suspect severe under- or over-extrusion that persists across filaments, calibrate extruder steps following your printer’s procedure.
- Temperature
- Print a small test or temperature tower spanning roughly 195–220 °C.
- Choose the segment with the best compromise between layer bonding and minimal stringing. If details are sharp but layers split under light flex, you are too cold. If glossy and stringy with oozing, you are too hot.
- Retraction
- Run a retraction tower or simple dual-post stringing test.
- Increase distance or speed incrementally until stringing reduces, then stop. Over-retraction causes jams and nozzle clogging over time; use the minimum that works.
- Flow/extrusion multiplier
- Print a single-wall cube using a known line width (e.g., 0.45 mm with a 0.4 mm nozzle).
- Measure wall thickness with calipers. If the measured value differs significantly, adjust flow by a few percent and re-test.
- Prioritize consistent extrusion over perfect caliper agreement if the difference is within your nozzle variability and slicer’s assumptions.
- Cooling and speed balance
- For crisp overhangs and corners, increase fan above 90% and moderate perimeters to 40–50 mm/s.
- For better inter-layer bonding, reduce fan to around 70–80% and slightly increase temperature (e.g., +5 °C), recognizing surface softness may increase.
- First-layer adhesion
- Aim for a smooth, slightly squished bead that just merges tracks without bulging.
- If edges curl or lift, try +5 °C bed, slower first layer, or a brim. If removal is difficult or elephant’s foot appears, lower bed temperature or reduce first-layer flow 2–5%, and consider a slight initial Z offset increase.
Diagnosing common PLA issues
Use the primary symptom to narrow likely causes and test one change at a time.
- Stringing and wisps
- Likely causes: Too hot; insufficient retraction; wet filament; long travel moves through hot zones.
- Fixes: Lower nozzle temp 5–10 °C; increase retraction distance or speed within safe bounds; ensure part cooling at or near 100% during small isolated features; dry filament if popping is audible.
- Poor layer adhesion or easy delamination
- Likely causes: Too cold; too much fan; contaminated surfaces or drafts causing uneven cooling.
- Fixes: Raise temp 5–10 °C; reduce fan to 70–85%; enclose or shield from drafts (but avoid overheating the cold end); ensure filament diameter is correct and consistent in slicer.
- Elephant’s foot (widened base)
- Likely causes: Bed too hot; too much first-layer squish; high initial flow.
- Fixes: Reduce bed temp 3–10 °C after first layer; increase initial Z offset slightly; apply slicer “elephant foot compensation” or reduce first-layer flow 5–10%.
- Corner lifting or minor warping (rarer on PLA)
- Likely causes: Dirty surface; bed too cool; part design with sharp corners; uneven plate temperature.
- Fixes: Clean surface; raise bed temp a few degrees; add a brim or fillet corners in CAD; consider textured PEI for more mechanical grip.
- Nozzle clogs or intermittent under-extrusion mid-print
- Likely causes: Heat creep (softening filament in heat break), dust/debris, over-retraction, old PTFE liner degradation.
- Fixes: Increase part cooling and ensure heatsink fan is unobstructed; reduce retraction; lower nozzle temp slightly; service the hotend (replace PTFE liner if applicable); consider a heat break with better thermal isolation.
- Surface zits and seam scars
- Likely causes: Pressure changes at layer change; excessive coasting or too little; retraction timing.
- Fixes: Align seam to sharp corners; tune coasting and wipe settings; enable linear advance or pressure advance if your firmware supports it; slightly reduce extrusion on outer walls.
- Brittle parts snapping under small loads
- Likely causes: Thin features oriented poorly; low temperature; insufficient walls or perimeters.
- Fixes: Reorient to load along layer lines; increase nozzle temp by 5 °C; use 3–4 perimeters and denser infill in stress areas; consider tough PLA or switch to PETG for higher ductility.
Surface quality: dialing in visual prints
- Perimeters and speed: For a silky visual finish even with standard PLA, try outer walls at 25–35 mm/s and inner walls faster. The speed drop alone often reduces ringing and roughness.
- Cooling strategy: Aim for stable, not turbulent cooling. Excess fan can over-chill tiny features, causing brittle tips or surface frosting.
- Seam hiding: Place seams at the back or at corners. In many slicers, “aligned seam” and “sharpest corner” options improve consistency.
- Ironing: For ultra-flat top surfaces, enable ironing with low flow (10–15%) and slow speeds. This works well on smooth build plates; it can overheat and blur detail if used everywhere.
- Bridging: Reduce temperature by 5–10 °C on bridging segments if your slicer supports it. Use 100% fan for the bridge and a lower flow ratio (e.g., 90–95%) to keep strands taut.
Strength tuning that genuinely helps
- Orientation: Load along filament strands and layer lines where possible. For a cantilever, rotate the part so layers run in the direction of tension.
- Perimeters: Increase perimeters before inflating infill. Three to four walls often improves real strength more than jumping from 20% to 40% infill.
- Infill patterns: Grid, gyroid, or cubic provide good isotropy for general use. Concentric infill may help round parts that see hoop stress.
- Temperature and fan: Slightly warmer (e.g., +5 °C) and slightly less fan (e.g., 70–85%) improves inter-layer fusion at the cost of crisper detail.
- Inserts and fasteners: For PLA, heat-set inserts must be installed with care at controlled temperatures and light pressure to avoid cracking. Pilot holes and broader bosses reduce stress.
- Annealing: Annealing can raise PLA’s heat resistance and sometimes strength but introduces shrinkage and warp risk. If you try it:
- Start with small test coupons matching your part’s critical thickness.
- Bake in a preheated, stable oven within roughly 80–100 °C. Use a support medium like fine sand or salt to limit distortion.
- Expect dimensional change; compensate in CAD if necessary. Some PLA blends respond better than others; do not anneal parts with tight tolerances without trials.
Handling, storage, and drying
PLA absorbs less moisture than nylons but still picks up water from humid air over time. Symptoms of wet PLA include:
- Audible popping as water flashes to steam at the nozzle.
- Excess stringing and a rough, matte surface where it should be smooth.
- Inconsistent extrusion with fine pitting.
Storage:
- Keep spools in sealed containers or bags with fresh desiccant.
- Avoid direct sun and high heat, which can warp spools and degrade pigment.
- Feed through filament guides that minimize rub and dust; dust can bake onto hotends and cause partial clogs.
Drying:
- A filament dryer designed for PLA is convenient; as a starting point many users dry PLA around 40–50 °C for several hours. Confirm your filament and dryer manufacturer guidelines and avoid softening the spool.
- For ovens, use a separate, well-controlled appliance; household ovens can swing widely. If you cannot verify temperature stability, avoid using them to prevent deformation or safety risks.
- Drying reduces moisture-related artifacts but cannot fix other material defects. If a spool prints poorly even when dry, try a different temperature, speed, or brand.
PLA variants and how to approach them
- Standard PLA
- Balanced stiffness and visual quality.
- Prints cool with high fan; great for detailed models.
- PLA+ or Tough PLA
- Modified for higher impact resistance and ductility.
- Typically benefits from slightly warmer nozzle settings (e.g., 205–220 °C) and moderate fan. Expect slightly more stringing pressure than standard PLA; tune retraction.
- Silk PLA
- Formulated for glossy flow and visually reflective layers.
- Often prefers moderate temperatures (e.g., 200–215 °C) and careful cooling to keep the sheen without over-softening. Mechanical strength can be lower; use more perimeters for functional parts.
- Matte PLA
- Contains fillers that diffuse light for a flat look; can mask layer lines.
- May require a bit higher temperature (e.g., 210–225 °C) to maintain layer bonding, especially with larger nozzles. The fillers can be mildly abrasive in some brands.
- Fiber-filled PLA (carbon, glass, metal, glow)
- Abrasive: use hardened nozzles. Expect to raise nozzle temp slightly because of lower thermal conductivity through the nozzle.
- Flows differently; increase layer height and use 0.5–0.6 mm nozzles to reduce clog risk. Strength improvements vary; carbon-filled PLA is often stiffer but not necessarily tougher.
- High-temp or annealable PLA blends
- Designed to respond better to post-print heat treatment with less shrinkage.
- Follow conservative annealing experiments; even these can change dimensions.
Slicer profile considerations
Cura, PrusaSlicer, Bambu Studio, OrcaSlicer, and others ship usable PLA profiles. As you adapt them:
- Check filament diameter and temperature: Confirm the slicer’s nominal diameter (usually 1.75 mm) matches your filament and set the nozzle and bed temps to the starting ranges above.
- Cooling: Ensure full fan after a few layers; adjust for bridges and tiny areas.
- Retraction: Use your tuned values from tests. Bowden systems usually need more distance.
- Pressure management: If your firmware supports linear advance (Marlin) or pressure advance (Klipper), tune it for crisper corners and reduced blobs at layer change.
- Coasting and wipe: Use sparingly; too much coasting introduces gaps, too little leaves zits. Small changes (0.1–0.3 mm coasting) can be enough in PLA.
- Accel and jerk: Lower values on outer walls reduce ringing; leave higher values for infill to retain speed.
- Flow per feature: Calibrating separate flow for walls and infill can improve quality on detailed parts.
Dimensional accuracy tips
PLA’s low warp makes it great for dimension-critical parts with the following practices:
- Hole sizing: Holes in FDM prints often come out undersized. Increase hole dimensions in CAD by a small offset (e.g., 0.1–0.2 mm for small holes) or use slicer “horizontal expansion” features sparingly.
- Threads and press fits: Print test coupons to confirm fits with your printer, nozzle, and chosen filament. Adjust perimeters and flow rather than relying solely on infill percentages.
- Shrinkage compensation: PLA shrinkage is low; if you see consistent scale error, verify steps/mm and extrusion, not just slicer compensation.
Practical cooling and enclosure notes
- Open air is typically fine for PLA; a full enclosure can raise chamber temperatures and increase heat creep risk for the hotend. If you must print enclosed, ensure strong cold-side cooling and consider lowering nozzle temp slightly.
- Multiple small parts: Increase fan and slow speeds to give layers time to cool, or print a sacrificial tower so each layer has time before the next pass.
Maintenance habits that keep PLA running smoothly
- Cold pulls: When switching from abrasive or filled PLA to standard PLA, consider a cold pull with nylon or a suitable filament to remove residue. Follow your hotend’s recommended temperatures for the procedure.
- Nozzle changes: Replace brass nozzles that printed abrasive PLA. Worn nozzles enlarge line width and blur details; if your dimensions drift wider over time, inspect the nozzle.
- Hotend hygiene: Avoid baking filament at high temperatures idle in the nozzle. If pausing long prints, lower temperatures to idle-safe values or move the nozzle away and reduce heat.
Health, safety, and responsible use
- Emissions and ventilation: PLA generally emits fewer noticeable fumes than ABS, but any thermoplastic printing can release ultra-fine particles and volatile compounds. Use the printer in a well-ventilated area and avoid leaning over the hotend during printing.
- Hot surfaces: Nozzle and bed are burn hazards. Allow cooldown before removal and use tools designed for part release.
- Food contact: Without validated material traceability and processing controls, assume printed PLA parts are not food-safe, especially with brass nozzles or porous layer lines that can harbor bacteria.
- Load-bearing and critical applications: Do not rely on PLA for safety-critical, high-temperature, or structural applications without appropriate engineering validation. Printed geometries can fail unexpectedly when overheated or impacted.
- Children and pets: Printed parts can break into sharp fragments. Supervise use and avoid small detachable pieces that present choking hazards.
Real-world use cases that fit PLA
- Desk organizers, drawer dividers, cable clips kept away from heat sources.
- Cosplay armor panels, masks, and props where lightness and finish matter.
- Architectural scale models, figurines, tabletop terrain, and display stands.
- Jigs for marking or drilling when loads are light and brief; for tougher jigs, consider tough PLA and more perimeters.
- Educational models demonstrating mechanisms at low torque; print gears with generous fillets and multiple perimeters to reduce tooth chipping.
When your use case pushes heat or impact, evaluate PETG, ASA, or PC blends instead.
Troubleshooting workflow examples
- Case: You see sudden gaps on tall prints but the first half looks perfect.
- Likely: Heat creep or partial clog forming as the hotend warms the heat break over time. Action: Improve heatsink airflow (clean fan, ensure duct alignment), reduce retraction, lower temp by 5 °C, and check if the issue vanishes on a smaller test. If persistent, inspect the heat break and consider a bimetal or better-isolated design.
- Case: Perfect towers, but large flat plates lift at corners.
- Likely: Bed contamination or uneven plate heating; also sharp inside corners concentrate stress.
- Action: Thoroughly clean the surface; print with a brim; raise first-layer bed temp by 5 °C; add fillets or mouse ears at corners in CAD.
- Case: Great perimeters but messy top surfaces with ridges.
- Likely: Inconsistent pressure before top infill or over-extrusion.
- Action: Enable ironing at low flow on the topmost layers; reduce top infill speed; verify flow multiplier with a single-wall test; increase top solid layers by one or two for better coverage.
Practical ranges for advanced features
- Spiral vase mode: Works wonderfully with PLA. Try 0.2–0.3 mm layers, single perimeter 0.8–1.0 mm line width on a 0.4–0.6 mm nozzle, and 200–210 °C nozzle with 100% fan for crisp translucency.
- Thin walls: For 0.8–1.2 mm walls, set line width to an exact divisor; e.g., two lines of 0.4–0.45 mm each to avoid gaps. Increase perimeters rather than infill.
- Supports: With PLA’s cooling, tree supports or supports with dense interface layers remove cleanly. Lower interface temperature a few degrees if your slicer can vary it, and use high fan.
Recognizing brand-to-brand differences
PLA blends vary:
- Pigments and additives can affect flow, so confirm a starting temperature with the specific filament manufacturer and use a small calibration print rather than relying on color alone.
- Modified PLAs can change melt viscosity; if you see weak bonding at a standard temperature, creep up in small steps rather than jumping to PETG-like heat.
- Spool winding and diameter tolerance can impact extrusion smoothness. If you hit persistent banding with no other cause, try a different spool before chasing rare mechanical problems.
A note on environmental responsibility
PLA’s plant origin does not make it impact-free. Reduce waste by:
- Printing test coupons before full parts.
- Reducing avoidable skirts, brims, and failed prints through small calibration tests.
- Keeping a library of tuned profiles so you need fewer re-prints.
Local recycling streams for PLA vary; check community options, and consider spooling remnants into small projects.
Quick reference: resilient PLA starting profile
Here is a compact set of parameters you can load and then refine:
- Nozzle: 0.4 mm brass (hardened for abrasives)
- Layer height: 0.2 mm
- Temperatures: nozzle 205 °C, bed 60 °C (first), 55 °C (rest)
- Cooling: 100% after layer 3; 80% for strength-oriented parts
- Speeds: 20 mm/s first layer, 45 mm/s walls, 60 mm/s infill
- Retraction: 0.8 mm at 30 mm/s (direct drive) or 4.0 mm at 35 mm/s (Bowden) as a start
- Flow: 100%; adjust ±2–3% after wall test
- Adhesion: Skirt; brim for large flat bases
- Walls: 3 perimeters for functional parts; 2 for light models
- Infill: 15–25% grid or gyroid for general use
Use this as a starting baseline, then adjust systematically.
Conclusion: Get the most from PLA by embracing its boundaries
PLA shines when you exploit its low warp, crisp detail, and easy cooling, and respect its heat and toughness limits. Choose a suitable variant—standard for detail, tough PLA for modest impact, silk for showpieces, matte to hide lines, fiber-filled for stiffness or unique looks. Start within practical ranges, then diagnose with small experiments: temperature first, then retraction, then flow, then cooling and speed. Orient parts for load paths, add perimeters for real strength, and keep the filament dry.
With those habits, PLA becomes not just the beginner’s filament, but a fast, reliable tool for prototypes, fixtures, and standout visual parts that look better than they have any right to for the effort involved.