PETG filament guide: reliable settings for strong everyday parts
By Let’s 3D Studio · 18 min read
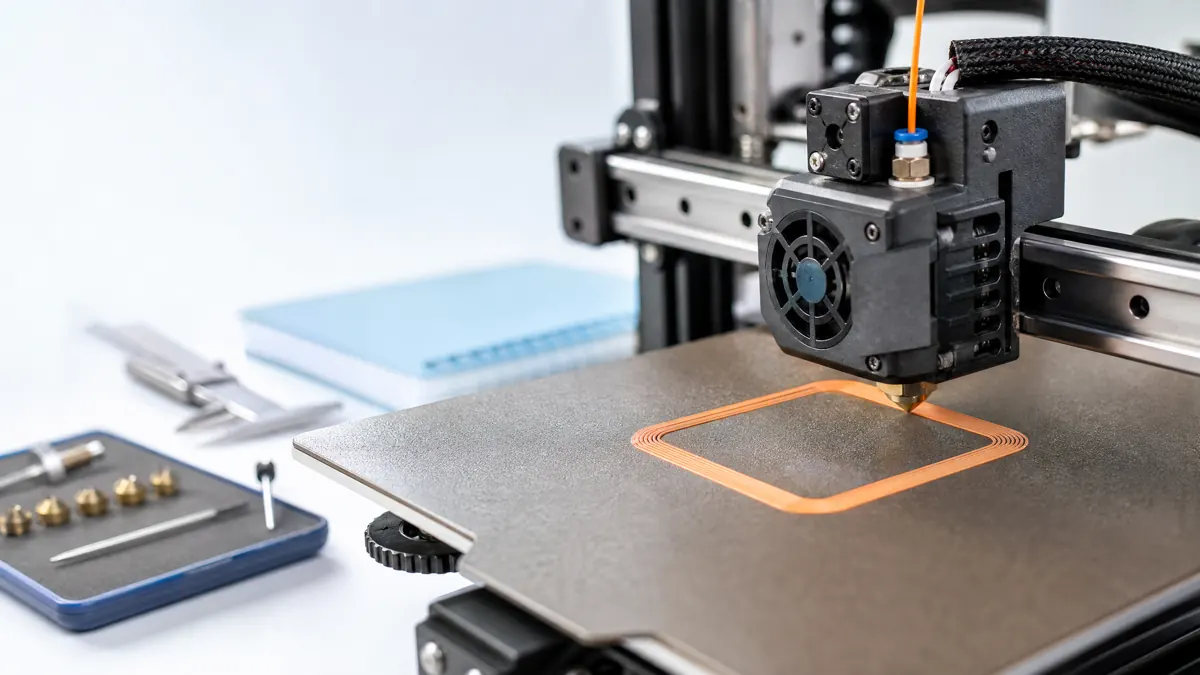
PETG sits in a sweet spot for everyday functional prints: tougher and more heat tolerant than PLA, yet easier to print than ABS or nylon. With the right setup, it delivers strong, impact‑resistant parts that hold up in the workshop, around the home, or outdoors under modest heat. This guide focuses on dependable settings, what to change when results go sideways, and how to design and handle PETG to get consistent, repeatable strength.
What PETG is good for (and when not to choose it)
PETG is polyethylene terephthalate glycol‑modified. In practice:
- Pros: High impact resistance, excellent layer adhesion, low warping, decent chemical resistance, and better heat tolerance than PLA. It prints with a glossy, tough finish, bonds layers aggressively, and can be translucent in some grades.
- Tradeoffs: More stringing than PLA, softer at elevated temperatures than ABS, and a tendency to stick too well to some build surfaces. Bridging and crisp overhangs are not its strongest suit, and it can show more oozing and zits at layer changes.
Choose PETG when:
- You need parts that will take bumps and flex slightly rather than shatter.
- The part may live in a warm space where PLA would creep or deform.
- You prefer low warping without a hard requirement for an enclosure.
Consider alternatives when:
- You need high heat resistance or solvent finishing like ABS provides.
- You need extreme wear resistance or very high strength‑to‑weight (consider nylon or fiber‑reinforced filaments).
- You require medical, food, or safety certifications that typical consumer PETG and 3D print surfaces do not provide.
Short comparison where useful:
| Property | PLA | PETG | ABS |
|---|---|---|---|
| Ease of printing | Very easy | Moderate | Moderate to difficult |
| Layer adhesion | Good | Very strong | Good |
| Heat tolerance | Low | Medium to medium‑high | Higher than PETG |
| Warping | Low | Low | Higher |
| Odor/fumes | Very low | Low | Noticeable |
| Surface detail | Crisp | Softer edges, glossy | Crisp |
Safety and printer setup
- Burns and heat: PETG prints hot. Avoid touching the nozzle or bed. Allow the machine to cool before part removal.
- Ventilation: While PETG generally emits fewer odors than ABS, always print in a well‑ventilated space. Follow manufacturer guidance for your machine and filament.
- Electrical and fire safety: Heated beds draw significant current. Use properly rated outlets and do not leave printers unattended for long runs.
- Food and liquids: 3D printed parts have pores that trap contaminants. Unless a specific system is certified as a whole (filament, printer, process, and post‑processing), do not assume food or medical safety.
- Build surfaces: PETG can bond extremely strongly to smooth PEI, plain glass, and some coated sheets. Use a sacrificial release layer (glue stick or a purpose‑made adhesive) or a textured surface to avoid permanent damage.
Filament storage and drying
PETG absorbs moisture slowly compared to nylon, but wet PETG increases stringing, shows bubbly extrusion, and loses surface quality.
- Storage: Keep spools in sealed bags or dry boxes with desiccant when not in use.
- Signs of moisture: More stringing than usual, popping or hissing sounds at the nozzle, frosted or pitted surface finish, inconsistent extrusion.
- Drying: If your brand permits, gentle drying can help. Many users report improvement after several hours in a filament dryer or a warm drying environment with strict temperature control. Always follow the filament manufacturer’s maximum temperature guidance. Overheating can deform the spool or degrade the polymer.
Reliable baseline settings at a glance
These are conservative, printer‑agnostic starting points. Expect to tune by brand, color, and hardware.
- Nozzle temperature: 235–250 °C for standard PETG
- Bed temperature: 75–90 °C first layers, 70–85 °C afterwards
- Cooling fan: 20–40% for general printing; up to 60–80% on bridging only
- Layer height: 0.16–0.28 mm (0.2 mm common)
- Nozzle size: 0.4 mm typical; 0.6–0.8 mm for fast, strong parts
- Print speeds: 35–60 mm/s perimeters, 40–70 mm/s infill; travel 140–200 mm/s
- Retraction (direct): 0.4–1.2 mm at 25–40 mm/s
- Retraction (Bowden): 1.0–4.0 mm at 25–50 mm/s
- Flow (extrusion multiplier): 95–103% depending on filament and nozzle
- Walls and infill for strength: 3–4 perimeters and 20–40% infill as a practical start
- Adhesion: Textured PEI or a smooth surface with a light glue release layer
Slicer setup in detail
Nozzle temperature
- Start around 240–245 °C and adjust in 5 °C steps.
- Too low: Poor layer adhesion, brittle parts, matte surface that scuffs easily, under‑extruded corners.
- Too high: Excessive stringing, surface gloss with minor sagging at overhangs, and more blobs at layer changes.
- Transparent PETG grades often need a bit more heat than opaque or black grades.
Bed temperature and build surfaces
- First layers at 80–85 °C help with stick; reduce a little after the first few layers to around 70–80 °C to limit elephant foot and ease part release.
- Smooth PEI or glass: Apply a thin film of PVA‑based glue stick or a purpose‑made adhesive as a release barrier. This keeps PETG from biting into the surface.
- Textured PEI: Generally reliable for PETG and reduces over‑bonding; still clean with isopropyl alcohol when cool.
- Tape: Blue painter’s tape or similar can work, but PETG may fuse to certain tapes. Test on a small area first.
- Flex plates: Let the part and plate fully cool before flexing; forcing a hot release can bend sheets or warp parts.
Short build surface guide:
| Surface | Adhesion risk with PETG | Notes |
|---|---|---|
| Smooth PEI | High if bare | Use glue as a release barrier |
| Textured PEI | Medium, controlled | Often ideal; clean regularly |
| Glass | Medium to high | Use glue; avoid sharp tools |
| Painter’s tape | Low to medium | May tear; test adhesion |
Cooling
- General printing: 20–40% fan maintains layer bonding while stabilizing small features.
- Bridges: Bump to 60–80% only during bridging. Prolonged high cooling can weaken layers.
- Enclosures: PETG does not require an enclosure; if you use one, moderate the internal temperature so the part cooling fan still has effect and the hotend heatsink stays cool.
Speeds and accelerations
- Perimeters: 35–60 mm/s maintains accuracy and helps reduce stringing.
- Infill: 40–70 mm/s works well; oversized nozzles tolerate more.
- Travel: 140–200 mm/s reduces ooze time between islands. Use combing to keep travels inside perimeters where possible; avoid crossing perimeters to minimize stringing.
- Acceleration and jerk: Moderate values prevent ringing and reduce ooze at direction changes. If your firmware allows, try perimeter accelerations around 500–1500 mm/s² as a starting envelope and increase if surfaces remain stable.
Retraction and coasting
- Direct drive: 0.4–1.2 mm at 25–40 mm/s typically prevents stringing without grinding.
- Bowden: 1.0–4.0 mm at 25–50 mm/s helps overcome tube elasticity.
- Minimum travel for retraction: Set around 0.8–1.5 mm so the slicer does not retract for tiny hops.
- Extra restart distance: Often unnecessary for PETG; if you see gaps after travel, add a small positive value. If you see blobs after retractions, try a tiny negative value.
- Coasting: Use cautiously; it can hide symptoms of under‑extrusion. If enabled, keep it small.
- Wipe on retract: Can help reduce zits; test on calibration towers.
Flow and extrusion multiplier
- Start at 100% and adjust by 1–2% at a time.
- Over‑extrusion shows as thick, glossy seams or elephant foot; under‑extrusion shows as gaps, weak layer fusing, and rough top layers.
- Calibrate with a single‑wall cube if necessary, but validate against real parts with multiple walls to ensure practical strength.
First layer and Z offset
- Z offset is critical with PETG. Too close traps material and bonds too aggressively; too high gives poor adhesion and rough lines.
- Aim for a first layer that is slightly flattened but with visible line boundaries. If lines smear into a glassy sheet, raise Z a touch. If you can catch a line with a fingernail, lower slightly.
- Slow the first layer to 15–25 mm/s; keep first‑layer fan off or very low.
Infill, walls, and top/bottom layers
- For functional parts, prioritize perimeters over infill density. Three to four walls typically provide more predictable strength than over‑stuffed infill alone.
- Infill patterns: Gyroid and cubic infills balance strength and speed. Grid is easy to print but can concentrate stress.
- Top layers: With a 0.2 mm layer height, use 5–7 solid top layers to close infill lines if you see pinholes. Bottom layers: 3–5 is a practical start.
- For parts oriented to take bending loads, increase perimeters in the load direction.
Supports
- PETG sticks to support interfaces more than PLA. Use lower support interface flow (for example, 90–95%) and extra Z distance or air gaps of 0.25–0.35 mm depending on layer height.
- Support patterns with fewer contact points, like lines or grid with low density, are easier to remove.
- Increase cooling on support interfaces only if your slicer allows per‑feature fan control.
Z seam and combing
- Z seam behavior affects surface quality with PETG’s tendency to ooze. Try the following:
- Place seam at rear or in a corner for non‑cosmetic parts.
- Use aligned seams when you prefer a single hidden seam over random pockmarks.
- Enable wipe on retract and reduce linear advance or pressure advance slightly if seams bulge.
- Combing within infill keeps travels inside, reducing strings on outer walls.
Troubleshooting and tuning
Stringing
Symptoms: Wispy hairs between features, fine residue inside hollow areas.
Root causes:
- High nozzle temperature
- Insufficient retraction or slow retraction speed
- Moist filament
- Long travel moves across open spaces
- Minimal cooling or high chamber temperature
Actions:
- Lower nozzle temp in 5 °C steps until layer bonding remains reliable.
- Increase retraction length by 0.2–0.5 mm (direct) or 0.5–1.0 mm (Bowden); do not exceed the extruder’s comfort zone.
- Increase retraction speed up to 35–50 mm/s if your extruder can handle it.
- Raise travel speed to reduce ooze time; enable combing and avoid crossing perimeters when possible.
- Dry filament and store it sealed.
- Use a temperature tower and a retraction tower to find a balanced combination.
Blobs and zits at layer changes
Symptoms: Small bumps where each layer starts, sometimes with ripples after.
Root causes:
- Excess pressure in the nozzle at the end of a segment
- Retraction timing and wipe distance not tuned
- High flow or too much linear/pressure advance
Actions:
- Reduce flow by 1–2%.
- Enable wipe on retract and try a small wipe distance.
- Fine‑tune retraction extra restart or coast a tiny amount only if needed.
- Adjust seam placement; aligned seams can hide the defect on a corner.
- Slightly reduce print speed to stabilize pressure, or tune pressure/linear advance for PETG’s viscosity.
Under‑extrusion and weak layers
Symptoms: Gaps between roads, top infill not closing, brittle parts.
Root causes:
- Too low nozzle temperature
- Part cooling too high, chilling the bead
- Filament snagging or tight path through the spool guide
- Clogged or partially blocked nozzle from burnt residue
- Incorrect flow calibration
Actions:
- Raise temperature 5 °C at a time until layers fuse reliably.
- Reduce fan to 20–30% generally.
- Check spool friction; unwind a few loops if the filament is cross‑wound.
- Cold pull or replace the nozzle if a blockage is suspected.
- Increase flow by 1–2% and verify with a small functional print rather than a single‑wall only test.
Layer adhesion and delamination
Symptoms: Layers split under stress, usually in tall walls or large section changes.
Root causes:
- Nozzle temperature too low
- Excessive cooling
- Printing in a drafty, cold room
- Part geometry with thin sections meeting thick sections causing thermal stress
Actions:
- Increase nozzle temperature and reduce general fan speed.
- Shield the printer from drafts; a simple barrier helps.
- Add chamfers or gradual transitions where thick and thin meet to even out cooling.
Warping and corner lift
PETG rarely warps compared to ABS, but large flats can lift at corners.
Actions:
- Use a brim for large footprints.
- Increase first‑layer bed temp slightly and ensure Z offset is dialed in.
- Consider a textured surface or apply a consistent adhesive film.
Poor bed adhesion or parts fusing to the plate
- If the part won’t stick: Clean the build plate with isopropyl alcohol when cool, increase first‑layer squish slightly, and raise the first‑layer bed temperature a little.
- If the part sticks too much: Add a release layer (glue stick film), lower first‑layer temperature by a few degrees after the first layer, or switch to a textured sheet. Let the bed cool fully before removal.
Bridging and overhangs
PETG sags more than PLA in bridge spans and overhangs.
Actions:
- Enable bridge‑specific settings with higher fan and slightly lower flow.
- Reduce bridge speed to allow cooling time.
- Add sacrificial ribs or shallow support where appearance matters.
- Orient the model to minimize critical bridges.
Dimensional accuracy, holes, and press‑fits
- Holes print undersized with all FFF materials due to arc discretization and material swelling. For PETG, allow generous clearance for press‑fits and sliding parts.
- Practical starting clearances:
- Pin in hole: Add 0.2–0.4 mm total clearance for snug, 0.4–0.6 mm for easy sliding, depending on nozzle and layer height.
- Mating faces: Consider 0.1–0.2 mm per side to account for squish and elephant foot. Use chamfers at the bottom to reduce first‑layer interference.
Hardware considerations
Nozzle choice
- Brass nozzles are fine for PETG; the material is not especially abrasive unless filled with fibers or particles.
- A 0.4 mm nozzle balances detail and strength. Larger nozzles (0.6–0.8 mm) reduce print time and increase bead width for tougher parts but soften surface detail.
- Keep nozzles clean. PETG can wick onto the tip and create caramelized buildup that drags against walls. Wipe the hot nozzle with an approved cloth or cleaning filament as per your printer guidance.
Extruder and hotend
- A consistent filament path helps PETG retractions. Check that the extruder gear is clean and the idler tension is appropriate to avoid grinding.
- All‑metal hotends handle PETG temperatures comfortably. If using a PTFE‑lined hotend, follow the maker’s limits for maximum temperature.
- Prevent heat creep: Ensure the hotend’s heatsink fan runs properly so softened filament does not expand upward and jam.
Bed surfaces and maintenance
- PETG can permanently mark smooth PEI and some coated beds if over‑squished or overheated during the first layer. Use a release film or a textured surface.
- Clean only when cool to avoid thermal shock. Avoid sharp scrapers; flex plates help with release after cooling.
Direct vs Bowden
- Direct drive systems provide more consistent retraction and are often easier to tame with PETG, though Bowden can print PETG well with tuned retraction and travel speeds.
Post‑processing PETG
- Support removal: PETG can fuse to supports. Lower interface flow and add an air gap. For stubborn contacts, carefully use flush cutters and a deburring tool.
- Sanding: PETG gums up sandpaper when hot. Wet sanding and light pressure help. Start with finer grits than you might for PLA.
- Drilling and tapping: PETG is tough and forgiving. Use sharp tooling, low to moderate speeds, and back out often to clear chips. Self‑tapping fasteners work, but test pilot hole sizes to prevent cracking.
- Heat‑set inserts: PETG accepts heat‑set brass inserts well. Use a temperature‑controlled tool and press slowly to avoid bulging. Let the polymer re‑solidify fully before loading the insert.
- Painting: Lightly sand, clean, and apply a plastic‑compatible primer for better paint adhesion.
- Gluing: Cyanoacrylate can work but may produce a brittle joint; epoxies generally bond more reliably. Test fit and roughen surfaces to improve grip.
- Annealing: PETG can shrink and warp unpredictably when heated after printing. If dimensional stability matters, test on a small coupon before attempting to anneal a final part.
Design for strong PETG parts
PETG’s layer adhesion is excellent, so leverage print orientation and geometry.
- Orient for load: Align perimeters along expected tensile loads. For brackets, print so layers wrap around mounting holes rather than pulling apart across the layer lines.
- Fillets and chamfers: Add generous fillets at internal corners to reduce stress concentrations. Chamfer the bottom of vertical holes to avoid elephant foot interference.
- Wall strategy: Rely on multiple walls before cranking infill density. Three or four perimeters with 20–40% infill often outperform two perimeters with very high infill.
- Ribs and bosses: Thin ribs add stiffness without massive infill. For bosses around screws, thicken walls locally and add fillets into the base plate.
- Holes and threads: For metal screws, size pilot holes to avoid splitting; for machine screws, consider heat‑set inserts. If printing threads, choose coarse profiles and generous clearance, or use thread‑forming screws made for plastic.
- Tolerances: PETG’s slight elasticity makes tight press‑fits more forgiving, but it can also creep under constant load. Use shoulders, washers, or spacers to spread load.
Example starting profiles to try
Treat these as first steps; adjust by brand, color, and hardware.
- General utility part, 0.4 mm nozzle, 0.2 mm layers
- Nozzle: 242 °C
- Bed: 82 °C first, 78 °C after
- Perimeters: 45 mm/s; infill: 55 mm/s; travel: 170 mm/s
- Fan: 25% after layer 3; bridges 70%
- Retraction: direct 0.8 mm at 30 mm/s (Bowden 2.5 mm at 35 mm/s)
- Walls: 3; top layers: 6; bottom layers: 4
- Infill: 25% gyroid
- Seam: rear; wipe on retract enabled
- Surface: textured PEI or smooth with a thin glue release layer
- Fast and tough, 0.6 mm nozzle, 0.28 mm layers
- Nozzle: 248 °C
- Bed: 85 °C first, 80 °C after
- Perimeters: 40 mm/s; infill: 55 mm/s; travel: 180 mm/s
- Fan: 20% general; bridges 60%
- Retraction: direct 0.6 mm at 30 mm/s (Bowden 2.0 mm at 35 mm/s)
- Walls: 3; top layers: 5; bottom layers: 4
- Infill: 20–30% cubic
- Seam: aligned to a back corner
- Detail‑oriented small parts, 0.4 mm nozzle, 0.16 mm layers
- Nozzle: 238–242 °C
- Bed: 80–85 °C
- Perimeters: 30–40 mm/s; infill: 40–50 mm/s; travel: 150–180 mm/s
- Fan: 30–40% for small features
- Retraction: prioritize clean starts; test 0.8–1.0 mm direct or 2.0–3.0 mm Bowden
- Z hop on retraction: 0.2–0.4 mm can reduce scars on tall parts
Quality control checklist
- First layer look: Lines just touching with slight flattening; part edges not bulging.
- Extrusion feel: No grinding sounds; consistent motor pitch; filament spool unwinds freely.
- Surface: Minimal globs at seams; no frosted or bubbly texture.
- Strength test: Parts flex without immediate cracking; holes withstand light press‑fit assembly.
- Dimensional check: Features at the base are not wider than above. Add a small chamfer to the model if elephant foot persists.
Common pitfalls and how to avoid them
- Over‑squished first layer on smooth PEI: PETG fuses to the plate and chips the surface. Use a release layer of glue and raise Z offset slightly.
- Treating PETG like PLA: High fan and low nozzle temperatures weaken parts and increase stringing.
- Excessive retraction in Bowden setups: Leads to jams and chewed filament. Increase travel speed and reduce crossing perimeters rather than cranking retraction endlessly.
- Ignoring moisture: A mildly wet spool adds just enough stringing and pitting to ruin surface quality. Store dry and redry if needed.
- Printing extremely cool for beauty: The part may look sharp but be brittle. PETG rewards slightly warmer, slower printing for durable results.
A diagnostic approach: change one thing at a time
When dialing in a new spool, isolate variables:
- Print a temperature tower to bracket a useful range.
- Print a small test with multiple islands to tune retraction and travel behavior.
- Adjust fan, seam, and wipe settings only after temperature and retraction are stable.
- Validate on a functional part. Minor stringing that wipes off easily is often acceptable if the part is stronger and more dimensionally consistent.
Keep written notes per brand and color. PETG formulations and pigments vary, so confirm temperature and flow with a small calibration print for each spool rather than relying on color alone.
Frequently asked practical questions
- Why is my PETG shiny and smeared on the first layer?
- Nozzle too close or too hot; raise Z offset slightly or drop first‑layer temperature, and reduce first‑layer speed.
- Why does PETG make angel‑hair strings even at low temperature?
- Moisture is likely. Dry the filament, increase travel speed, and ensure combing avoids crossing external perimeters.
- Can I get crisp overhangs like PLA?
- PETG tends to soften and pull. Use lower speeds, targeted higher fan for overhang regions, and accept gentler angles or add small supports.
- My part fuses to supports. What now?
- Add a Z distance gap, lower support interface flow, and consider using a sparse interface pattern. Increase fan only for the interface layers if supported by your slicer.
- Is PETG UV resistant?
- Many PETG grades hold up outdoors better than PLA, but performance varies widely. For long‑term exposure, consider specialty outdoor‑rated materials and test in your environment.
Practical caveats and responsible use
- Heat tolerance is better than PLA but not equivalent to engineering polymers. A car dashboard in direct sun on a hot day can still soften PETG components.
- Mechanical fasteners can stress‑whiten PETG if over‑tightened. Use washers and distribute load.
- Chemical exposure varies by formulation. Cleaners and solvents can affect PETG surfaces; test compatibility on a scrap piece before exposing a final part.
Conclusion: a dependable recipe for strong everyday parts
Printing strong, reliable PETG parts comes down to a few disciplined practices:
- Start moderately hot on the nozzle and warm on the bed, then trim temperature until layer adhesion is solid without runaway stringing.
- Keep cooling modest, reserving higher fan only for bridges or delicate features.
- Use measured retraction and faster travels to limit ooze rather than extreme retraction lengths.
- Favor multiple walls and sensible infill over extreme densities; orient parts to put layers in the best direction for load.
- Respect surfaces: use textured plates or a thin glue release layer on smooth sheets to prevent over‑bonding.
- Store spools dry and verify each new color or brand with small tests before committing to long prints.
With these habits, PETG becomes a reliable workhorse: forgiving on warping, tough in daily use, and predictable once you find the settings envelope your hardware prefers. It is not the sharpest‑edged showpiece material, and it will always ask you to manage some stringing. But when a part must survive real knocks and comfortable warm conditions without drama, PETG is among the most practical choices for the home and studio printer.