How resin 3D printing works: a safe first orientation
By Let’s 3D Studio · 19 min read
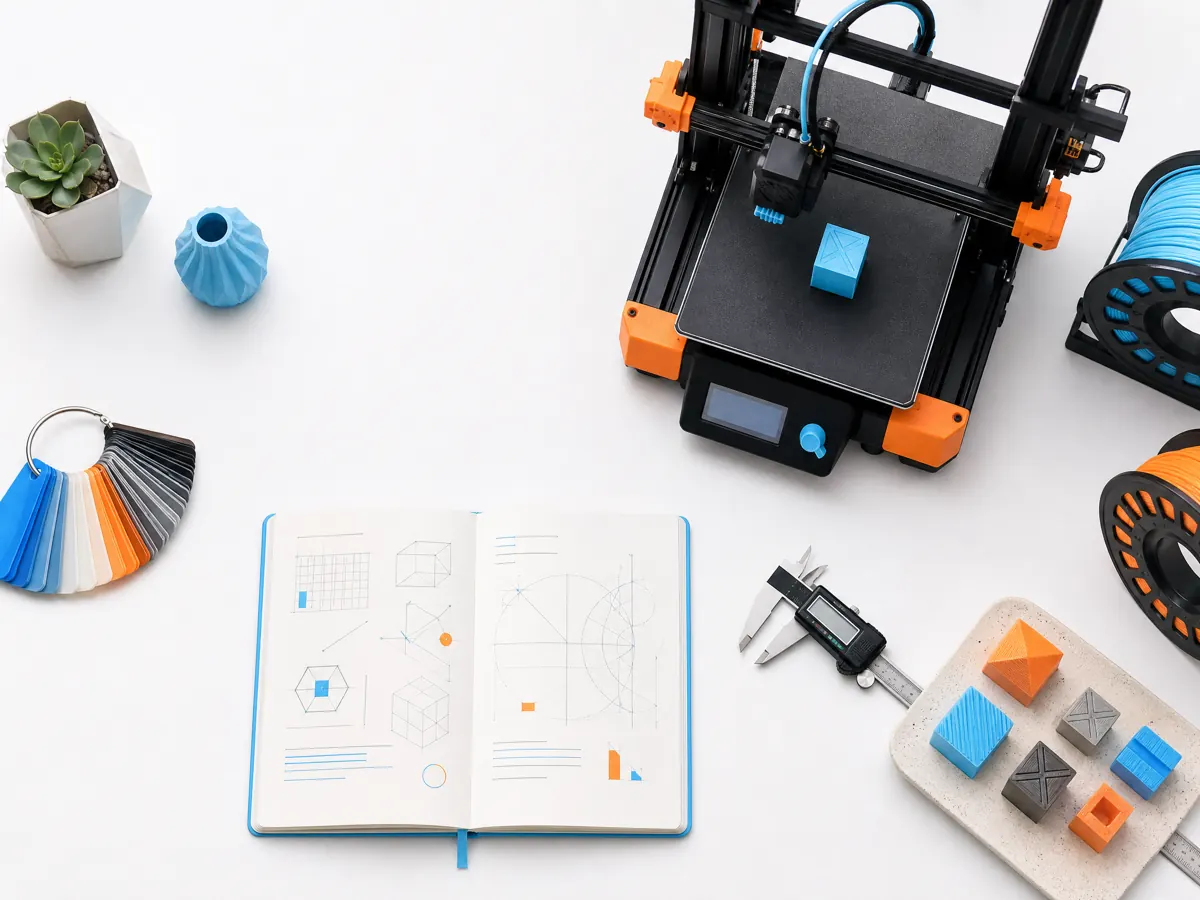
Resin 3D printing can produce smooth, highly detailed parts that FDM often struggles to match. It can also be messy, smelly, and hazardous if you approach it casually. This guide gives you a safe and practical orientation: how the process works, what choices matter, how to calibrate your first prints, and how to handle materials and tools responsibly.
If you’re new, aim to learn by controlled steps. Start with small, simple parts, a single resin type, and a clean, ventilated workspace. Build good habits early, and you’ll save time, money, and frustration.
What resin 3D printing is doing under the hood
At the heart of resin printing is photopolymerization: a liquid resin containing photoinitiators and oligomers turns into a solid when exposed to specific wavelengths of light, commonly around 405 nm. The printer forms your model layer by layer by controlling where and how long the resin is exposed.
The photopolymer basics
- Photoinitiators absorb UV or near-UV light and break into reactive species (free radicals).
- Those radicals start chain reactions in acrylate or methacrylate groups, creating cross-links.
- Cross-linking transforms the liquid layer into a solid network with the geometry defined by your sliced image for that layer.
Key variables that affect curing:
- Wavelength and intensity of the light source
- Exposure time and how it changes across different geometries
- Resin chemistry and temperature
- Separation forces when peeling the cured layer off the film at the bottom of the vat
Three common resin printer types
All three share the same chemistry but differ in how they project light:
- Laser-based SLA (galvo SLA): A laser beam scans across the vat to draw each layer. Exposure is delivered point-by-point. Tuning involves laser power and scan speeds.
- DLP: A digital micromirror device (DMD) projects the entire layer in one shot. Exposure is uniform across the layer (modulo optics).
- mSLA (LCD): A UV backlight shines through an LCD mask, exposing the whole layer at once wherever pixels are transparent. This is the most common hobby format today.
Practical consequences:
- mSLA and DLP typically cure layers faster because they expose the entire layer simultaneously. Laser SLA can offer very smooth curved surfaces with fine spot sizes.
- In mSLA, XY resolution is set by the LCD pixel size; in DLP, by the projector pixel size and optics; in SLA, by laser spot size and scan precision.
- Uniformity and edge sharpness differ slightly among methods, which can influence optimal exposure and anti-aliasing.
Resolution, pixel size, and Z height
- XY resolution: limited by pixel size (mSLA/DLP) or beam diameter (SLA). Typical hobby mSLA pixel sizes range roughly 22–50 micrometers.
- Z resolution (layer height): set in your slicer, usually in the 30–100 micrometer range. Thinner layers can capture more vertical detail but increase print time and failure risk if not well tuned.
- Anti-aliasing and grayscale exposure can smooth the pixel stair-stepping; their effectiveness depends on resin response and projector/LCD behavior.
The step-by-step resin workflow
1) Design and slicing
- Export your model as an STL or 3MF.
- In a resin-oriented slicer, orient the part. Angling reduces peel forces by limiting cross-sectional area per layer and helps drain resin.
- Add supports to catch overhangs and isolated “islands.” For beginners, start with automatic supports and then manually reinforce critical load paths, islands, and fine features.
- Decide on hollowing and wall thickness. For many figurines and display parts, a 1.5–3.0 mm wall thickness is a practical starting range. Add vent/drain holes (2–4 mm diameter minimum; larger for viscous resins) so resin can escape.
Slicer parameters you’ll revisit:
- Layer height: 0.03–0.05 mm for fine detail; 0.07–0.10 mm for speed and robustness.
- Normal exposure time: see calibration ranges below.
- Bottom layers (also called burn-in layers): increased exposure to anchor the print to the build plate or raft.
- Lifting speeds and distances: tuned to limit peel force while not wasting time.
- Light-off delay or rest time: a pause between layers to allow resin to refill and stresses to relax.
2) Prepare the machine and workspace
Resin is hazardous in liquid form. Set the room for success:
- Use nitrile gloves, safety glasses, and protective clothing you reserve for resin work.
- Work on silicone mats or trays that can contain drips.
- Ensure ventilation. Use effective ventilation appropriate to the workspace and follow the resin safety data sheet and printer manufacturer guidance. Carbon filters may reduce odor but do not replace ventilation or source control.
- Keep paper towels, a plastic scraper, and designated containers for waste and solvent nearby. Store IPA or other cleaning solvents in a closed, clearly labeled metal or solvent-compatible container away from heat or spark sources.
Printer setup:
- Level the build plate per the manufacturer’s method. Typically, loosen plate screws, home Z with a clean sheet between plate and screen protector or FEP, press down evenly, and tighten evenly.
- Inspect and clean the vat and FEP/nFEP film. It must be free of cured bits, clouding, or punctures.
- Warm resin to a workable temperature. Many common resins behave more predictably near 22–28°C. Cold resin may require longer exposures and lifts.
3) Establish baseline exposure and motion
You need a starting point that matches your specific resin, machine, and temperature. Many hobbyists start here for modern monochrome mSLA printers:
- Normal layer exposure: roughly 1.8–3.5 seconds at 50 µm layers for general-purpose resins.
- Bottom exposure: 20–40 seconds for 4–8 bottom layers to ensure adhesion to the plate or raft.
- Lift distance: around 5–8 mm per layer for small to medium parts; larger or suction-prone geometries may benefit from 8–12 mm.
- Lift speed: around 50–120 mm/min. Heavier parts, viscous resins, or fragile supports may prefer 40–80 mm/min to reduce peel shock.
- Retract speed: often equal to or slightly faster than lift speed, e.g., 80–150 mm/min; overly aggressive retracts can trap bubbles.
- Light-off delay: 0.5–2.0 seconds to allow resin to resettle.
These ranges are not universal. If you have a different wavelength, older RGB LCD, a high-viscosity resin, or a different machine size, your numbers shift. Use them as starting points and calibrate based on results.
4) Start the print
A single layer cycle looks like this:
- Masked light cures the image for that slice of your model.
- Z-lift raises the plate, peeling the cured layer from the FEP/nFEP.
- The vat refills under the part; the plate descends.
- Optional rest allows resin to spread evenly.
- Repeat.
Listen for abnormal sounds (squeaks, pops, grinding) and watch initial layers to ensure the raft forms consistently. If layers are sticking to the FEP rather than the plate, pause and diagnose early rather than wasting the full print.
Safety essentials you must internalize
Resin is not a benign liquid, and solvent vapors are flammable. Plan for safety first.
- Skin contact: Avoid it. If resin gets on skin, wash promptly with soap and water. Do not use solvents on skin.
- Eyes: Always use safety glasses when handling uncured resin, scraping plates, or pouring. If resin contacts eyes, rinse thoroughly with clean water and seek medical guidance per the resin’s safety sheet.
- Inhalation: Work in a well-ventilated area. Filters can help reduce odor but may not eliminate all volatile components. Ventilation and minimizing open time are key.
- Food and drink: Keep them out of the work area. Do not use printed parts for food or drink contact unless the entire system, resin, and post-processing are designed and validated for that purpose.
- Fire safety: Many cleaning solvents (e.g., IPA) are flammable. Keep away from ignition sources, open flames, and hot plates. Store in closed containers. Do not smoke near your resin station.
- Waste and disposal: Collect waste IPA and resin-laden paper towels separately. Local regulations vary, but generally, liquid resin and contaminated solvents are hazardous waste. Do not pour IPA down drains. Small residues of resin can be cured fully under UV before disposal if allowed by local rules. Always check and follow your jurisdiction’s guidance.
- Storage: Keep resin in opaque, labeled containers, sealed, and away from sunlight. Temperature swings lead to inconsistent printing and potential leaks.
Resin types and how they behave
There is no single “best” resin. Each type trades off strength, stiffness, flexibility, heat resistance, castability, and printability.
- Standard resins: Often brittle but capture detail well. Good for figurines, visual models, and light-duty prototypes. Typically straightforward to print with short exposure times.
- ABS-like or tough resins: Blend higher impact resistance and less brittleness. They may need slightly longer exposures and slower lifts to avoid support breaks.
- Flexible and elastomeric resins: Shore hardness varies widely. They can trap bubbles, need careful venting, and benefit from gentle peeling. Expect longer exposures.
- High-temperature resins: Formulations intended for better heat deflection. Often more viscous and benefit from slower lifts and added venting.
- Castable resins: Designed to burn out for investment casting. They often require careful support strategies, delicate handling, and more rigorous post-cure controls.
- Water-washable resins: Easier to clean with water rather than solvents, but still hazardous uncured and should not go down drains. They may absorb moisture and can change mechanical properties faster with humidity.
- Dental/biocompatible resins: Use only as directed by the manufacturer, with validated post-processing. For hobbyists, treat them like any resin from a handling perspective and do not imply biocompatibility without the full validated workflow.
Within any category, exposure times, lift speeds, and curing protocols vary. Start at the vendor’s general recommendations if provided, then iterate.
Orientation and support strategies that actually work
Good orientation and supports are the difference between crisp parts and tangled failures.
- Angle the part: Instead of flat-on, tilt 10–45 degrees so each layer’s cross-sectional area changes gradually. This reduces peel force spikes and visible layer lines on critical faces.
- Drain and vent: Hollow parts reduce material use and peel stress, but only if they drain. Add at least two vent holes—one as an inlet for air and one as an outlet for resin—on hidden surfaces. Place them at low points based on your print orientation.
- Support where load travels: Visualize how the part hangs from the build plate during printing. Heaviest sections and overhangs need stout supports near their center of mass, with lighter supports for fine features.
- Avoid isolated islands: Use the slicer’s island detection. Any pixel that appears floating before it connects to existing geometry needs a support.
- Rafts and skirts: A modest raft can absorb peel shocks and makes removal from the plate safer. Too thick a raft increases waste and adhesion difficulty.
- Support tip sizes: As a starting range, 0.20–0.35 mm tip diameter for fine features and 0.35–0.50 mm for structural supports on medium parts. Increase diameter and shaft thickness for heavy or large features to prevent mid-print detachment.
Calibrating your first exposures and motion
A quick, structured approach saves time:
- Choose a single small test object with fine embossed text, holes, and thin walls. Include supported and unsupported overhangs.
- Start with middle-of-the-road slicer settings from the earlier ranges.
- Print two or three variants varying only normal exposure by about 10–15%. For example, 2.4 s, 2.7 s, 3.0 s at 50 µm.
- Examine:
- Are small holes open or closed? Closed holes point to overexposure or light bleed.
- Do embossed details look swollen? That’s often overexposure.
- Do thin features or supports fail mid-print? That points to underexposure or too-aggressive lift speeds.
- Are surfaces wavy or pulled? Could be inadequate rest time, trapped resin, or suction effects.
- Lock in normal exposure, then adjust lift speed and light-off delay only if you see detachments or surface artifacts.
After a few trials, you’ll converge on a stable baseline. Re-check when you change resins, ambient temperatures, or the screen/film.
Preventing suction cups and peel failures
Suction cups occur when hollow sections or cups trap resin and create a vacuum during peeling. They can rip supports or crack walls.
- Hollow with internal ribs to add stiffness without sealing large volumes.
- Add and test vent holes in every cavity. Often two per cavity help air exchange.
- Orient so that large concave faces peel off progressively rather than all at once.
- Reduce lift speed and increase lift distance until peeling is smooth.
- Add light-off delay so resin can equalize before the next exposure.
Post-processing: clean, cure, and finish safely
Done right, post-processing preserves detail and mechanical properties. Rushing or skipping steps leads to tacky surfaces, brittleness, or warping.
Cleaning
- Two-stage wash: A brief pre-wash in “dirty” solvent to remove the bulk resin, followed by a shorter rinse in “clean” solvent. This conserves solvent quality.
- Typical durations: 1–3 minutes per bath with gentle agitation. Extended soaks can cause swelling or cracks in some resins.
- Tools: A soft brush can help, but be gentle on sharp details. Basket-style washers limit handling damage.
- Draining and drying: Allow parts to drip-dry and flash off solvent fully before curing. A compressed-air puff can help clear cavities, but handle with care.
- Water-washable: Use the same caution. Do not pour resin-contaminated water into drains. Let residues cure fully and dispose per local rules.
Final UV cure
Cure after the part is clean and dry:
- Time: Thin-walled parts often cure in several minutes; thicker parts and filled resins need longer. As a practical range, 2–10 minutes in a dedicated curing station is common, but observe the part and avoid overheating.
- Orientation: Rotate or reposition halfway through for even exposure, especially for complex geometries.
- Heat: Some curing stations add warmth, which can improve cure but may warp thin parts. Use moderate temperatures and observe.
- Surface oxygen inhibition: If tackiness persists in specific resins, rinsing, gentle wiping, or covering with oxygen-limiting media during cure can help. Test on a small area first.
Finishing
- Support removal: Clip tips first, then peel the stems along their path. If brittle, warm water post-cure or partial cure before removal can reduce snap-offs. Be consistent.
- Sanding: Start with fine grits (e.g., 400–800) and move to higher grits if needed. Wet-sand to reduce dust.
- Priming and painting: Use primers compatible with plastics. Light coats maintain detail.
- Bonding: Many cyanoacrylates work well on cured resin; epoxies can fill gaps for structural joints.
Maintenance that keeps your machine predictable
- FEP/nFEP film: Inspect for scratches, clouding, or punctures. Replace if you see sticking, white haze in the contact zone, or persistent layer detachment in one area.
- Vat hygiene: Filter resin through a fine paint filter after failures or long prints. Do not mix unknown residues from different resins.
- Lens and screen: Keep the LCD or protective glass clean and dust-free. Wipe gently with appropriate cleaners; avoid harsh solvents.
- Z-axis: Clean and lightly lubricate the lead screw as the manufacturer recommends. Excess grease can fling onto the vat; use sparingly.
- Build plate: Keep it flat and clean. If adhesion falls off, resurface lightly following the manufacturer’s guidance or replace.
- Light source and LCD aging: Over time, exposure power may drop, requiring longer exposures. If your exposures creep upward and details degrade consistently, component wear may be a factor.
Comparing SLA, DLP, and mSLA at a glance
A quick comparison can help you understand trade-offs. These are tendencies, not absolute rules.
| Method | How it exposes | Typical strengths | Common trade-offs |
|---|---|---|---|
| Laser SLA | Scans a laser point-by-point | Smooth curves, fine spot potential | Slower at large areas, calibration of scan/path |
| DLP | Projects entire layer via DMD | Uniform exposure per layer, speed | Pixel optics define edges; cost varies |
| mSLA (LCD) | Backlight through LCD mask | Affordable, fast for hobby use | Pixel grid artifacts; screen wear over time |
Troubleshooting by symptoms
Use this as a first diagnostic pass when something goes wrong.
| Symptom | Likely causes | First adjustments to try |
|---|---|---|
| Raft or first layers detach from plate | Under-exposed bottom layers, unlevel plate, oily plate surface | Increase bottom exposure and/or bottom layers; clean and lightly scuff plate; re-level |
| Supports fail mid-print | Under-exposure, lift too fast, supports too thin | Increase normal exposure 10–15%; reduce lift speed; thicken support shafts and tips |
| Fine holes closed, edges bloated | Over-exposure, light bleed, anti-aliasing too high | Reduce normal exposure 10–15%; lower anti-aliasing or blur; orient to reduce long exposures on thin walls |
| Layer lines tearing or “elephant skin” | Over-exposure with peel stress, trapped resin | Reduce exposure; add vent holes; lower lift speed and increase light-off delay |
| Surface ripple near large flats | Suction cup effect, insufficient rest time | Re-orient; add vents; increase light-off delay; increase lift distance |
| Warping after cure | Over-cure heat, uneven cure, residual solvent | Cure in shorter cycles; allow parts to dry fully; rotate during cure; lower cure temperature |
| Persistent sticking to FEP | Damaged FEP, contaminated film | Replace or clean film; filter resin; re-check exposure and Z offsets |
Light and motion settings: a practical starting framework
Rather than memorize exact numbers, think in cause-and-effect patterns:
- If small features don’t form: Increase exposure slightly or decrease lift speed.
- If holes close and details swell: Decrease exposure slightly, reduce anti-aliasing strength, and consider reorientation.
- If parts keep tearing off at the same Z height: Inspect FEP for damage or clouding in that region and slow down lifts.
- If you hear loud pops during lift: That’s likely suction. Increase venting, reorient to reduce large cross-sections, and slow lifts with a bit more lift distance.
Approximate ranges for many hobby mSLA setups at room temperature:
- Layer heights: 0.05 mm for detail; up to 0.1 mm for speed.
- Normal exposure: 1.8–3.5 s at 405 nm monochrome LCDs with general-purpose resins.
- Bottom exposure: 20–40 s; bottom layers 4–8.
- Lift speed: 40–120 mm/min; retract 80–150 mm/min.
- Lift distance: 5–12 mm, tuned to geometry.
- Light-off delay: 0.5–2.0 s.
Expect to deviate when you change resins, screens, or temperatures.
Handling and reusing resin responsibly
- Stirring and mixing: Gently stir or roll unopened bottles to re-disperse pigments and fillers. In the vat, stir slowly with a resin-safe tool before printing.
- Filtering: After a failed print or long idle period, filter resin through a fine mesh (for example, 190–250 micron paint filters) back into its original bottle if it’s going to be reused soon and you have not mixed brands. Label clearly and keep batches consistent.
- Sunlight caution: Ambient light cures resin. Keep the vat covered, and do not leave the printer near direct sunlight.
- Cross-compatibility: Mixing resins can produce unpredictable results. If you experiment, do so in small quantities with careful notes on settings.
Environmental and health perspective
- Even “low-odor” or “water-washable” resins are not risk-free. Odor is not a reliable indicator of hazard.
- Gloves are consumables. Replace them when contaminated or ripped.
- Set a cleanup routine: Wipe down the build area, dispose or cure residues, close all containers, and wash hands after removing gloves.
- Plan for spills: Keep absorbent pads nearby. Collect and cure residues. Decontaminate surfaces with appropriate cleaners.
Practical FAQ for a confident first print
How do I know if the plate is really level?
- Print a small, flat test across the plate or check that the first raft layers form evenly at multiple points. If one corner consistently fails, re-level and verify plate flatness.
Should I print flat-on for maximum strength?
- Flat-on can reduce supports, but it often increases peel forces and suction, risking failure and plate damage. For most shapes, a modest tilt balances strength, finish, and success rate.
Is water-washable resin safe to rinse down the sink?
- No. The wash water is contaminated with uncured resin and should be collected. Follow local disposal rules, and cure residues before disposal where allowed.
Why are my parts sticky after cure?
- Residual solvent, incomplete cleaning, or oxygen inhibition. Let parts dry fully after washing, cure in shorter cycles while rotating parts, and confirm wash times are adequate.
Can I use the same IPA forever?
- No. Rotate your baths. When the clean bath looks cloudy or feels resinous, move it to the dirty station and replenish the clean one. Dispose of the dirtiest according to local hazardous waste rules.
Is it okay to leave resin in the vat between prints?
- For short intervals in a dust-free, dark environment, many users do. If the printer is idle for days, filter back into the bottle to reduce risk of sediment buildup, screen leaks, and accidental curing.
How warm should the room be?
- Many general-purpose resins behave more consistently around 22–28°C. If colder, you may see longer exposures needed and sluggish resin flow.
What’s the simplest improvement for success?
- Better orientation and support placement, plus slightly slower lift speeds. Reducing peel stress beats cranking exposure in many cases.
A short case-style reasoning example
Imagine a 70-mm-tall figurine printed at 50 µm layer height on an LCD printer. You used 2.4 s exposure, 35 s bottom exposure for 6 bottom layers, 80 mm/min lift, 6 mm distance, and a light-off delay of 0.75 s.
Observed:
- Supports snapped around mid-thigh.
- Tiny holes on the belt are closed.
- There’s a faint ripple under the cape’s broad area.
Reasoning:
- Closed small holes and slightly swollen details suggest mild over-exposure.
- Support snapping could also indicate too aggressive lift speeds or insufficient support thickness.
- Ripple under the wide cape implies suction cup behavior.
Adjustments:
- Reduce normal exposure 10–12% (from 2.4 s to about 2.1–2.15 s).
- Reinforce key supports on the thigh and cape with thicker shafts and slightly larger tips.
- Reduce lift speed to around 60 mm/min and increase lift distance to 8 mm to ease peel-off.
- Add a small vent at the hidden side of the cape and reorient by an extra 10–15 degrees to reduce large layer areas.
Reprint likely yields cleaner belt holes, intact supports, and reduced ripple.
Common myths to avoid
- Myth: More exposure always increases success. Reality: Too much exposure closes details, causes elephant skin, and can trap stresses. Balance exposure with lift tuning and orientation.
- Myth: Water-washable resin is safe like ordinary plastic. Reality: Uncured resin remains hazardous; treat it with the same caution and disposal care.
- Myth: Anti-aliasing fixes all pixelation. Reality: It helps visually but can contribute to feature swelling if combined with over-exposure.
- Myth: You must hollow every part. Reality: Hollowing reduces resin use and peel forces but adds complexity and risks suction. For small, dense items, solid may be simpler.
A practical first-print checklist
- PPE on, ventilation running, work surface protected
- Machine leveled, FEP/nFEP clean
- Resin warmed and stirred, vat filled to the recommended level
- Part oriented with drainage, islands supported, modest raft chosen
- Baseline exposures and motion set within the practical ranges
- Initial layers observed for solid anchoring
- Wash station set up with two baths, labeled, with lids nearby
- Post-cure plan ready, including rotation or repositioning mid-cure
- Waste containers labeled and accessible
Conclusion: master the process by managing forces and chemistry
Resin 3D printing succeeds when you balance light, motion, and material behavior with safety-first handling. Understand what the light is doing (exposure and pixel effects), what the mechanics are doing (peel forces, suction, refill), and what the chemistry needs (cleaning and thorough final cure). Use practical starting ranges, then iterate through small, deliberate changes as you interpret each print’s feedback.
Keep your workspace organized, your consumables under control, and your process disciplined. With those habits—and the troubleshooting patterns in this guide—you’ll produce crisp, reliable parts while protecting your health, your equipment, and your time.